Wednesday, December 21, 2011

Second Sphere competition entry- Deathskull Looted Wagon

Wow, talk about being busy! I've had nearly no time to sit down and paint or do anything hobby related since the week before the last big Apoc game as we've been getting stuck into some major home renovations and landscaping upgrades. While this is all well and good it does mean that I've felt bad about neglecting the hobby, and in turn my Blog. I'm hoping to pick up the pace again over the Xmas-New Year's break as i'm not going anywhere or doing anything major, so unless something appears straight out of left field then I should get some more painting and posts completed.

so, on to the topic at hand. I was trawling through a few of my favourite 40K-centric forums the other day and saw that entries for the Second Sphere Heavy Support contest was ending very soon. With my Deathskull Orks recently base coloured I thought it might be best to complete one of the mini/s from their as a submission, however there was a few issues...

The first was time- i'd glanced at this contest ageeeees ago when the rules and details were first put up online, and in the back of my mind had locked in the 22nd of December as the submission deadline. Lucky I looked at the rules post again, because the submission date was actually the 21st, with the voting starting from the 22nd! So I was trying to complete my entry on the last day for submissions to be accepted!! I wish I could say this was the only time this has happened but I'd be lying through my teeth. However, as history shows this is usually when I'm at my most productive- nothing like a looming deadline to get tasks out of the way!!

The second issue I had was with choice- in my current Ork army I have 3 Killa Kans, 2 Battlewagons and a Looted Wagon (with Boomgun) as possible HS choices, all of which were done up in their base colouring- Hawk Turquoise blue, Devlan Mud washed, Boltgun Metal drybrushed, with a nice Blazing orange "rust effect", with random white checks and dags. But which of these to do up?

  • Battlewagons- although super cool and imposing, I opted against finishing one of these as there was way too many small details remaining to be painted, and to look good enough to stand a chance of winning I'd have to paint up the crew in their gun cupolas, grabbin claw hatch and the two ladz in the tray manning the big shootas. Im thinking that once both Bwagons are completed i'll be happy to chuck one into the "Transports" competition which comes up early on 2S every year.
  • Killa Kans- I literally had a Kan in hand last night about to apply paint to model when I decided against it- whilst i've used Devlan Mud wash to highlight all the hydraulics of the engines, legs and arms/weapons of these models I feel that i'd regret rushing their paintjobs to make a competition deadline. All in all the Kans are my favourite models in the armym, and this persuaded me to work on them with a bit more care and to take my time. Sorry ladz- i'll get to you soon though!
  • Looted Wagon- so yes, eventually the Wagon got the go-ahead for a quick completion job to make the competition deadline. The blue was touchup up with some more stippling in the middle of the panels to brighten it up and make the paintjob "pop". When doing this I stayed away from panel edges, joins and 'damaged' parts of the tank where the Devlan wash and Blazing Orange "rust" was found. I also gave the tracks and wheels a quick hit of Boltgun Metal (they were still in black undercoat), folowed by a single heavy wash of Devlan. The majority of the time spent was on the twin pistols (with leather holsters), banner pole and icon strapped to the back of the turret- ironically, when I ended up taking the photos and picking out the three to submit you really cant see any of tthe detail or time that went into this work. I also went back and applied a second hit of thinned/semi-wash Blazing Orange to the current rusty parts of the tank where I felt the colour should be more pronounced, with pure dots of the colour applied where large orange bubbles of rust should show through.
With all my painting done, it was time to get some photos. Some people like to photograph outside in natural light, but if you're like me then you'll want more control- for this reason I use what is commonly referred to as a 'light box". Put simply, a lightbox is a box (OMG no way!) with a bright colour on some or all of its internal walls to reflect light around the object placed in the middle of the box. My lightbox is a carboard carton originally used to hold reams of A4 printer paper- i've cut one side out so its now two side walls, a back wall and floor, all of which have had white A4 paper glued into place. I've then used a pure white energy saving globe (i've found these to provide excellect illumination with almost no colour distortion) positioned just above the camera that i've used for the photos. As for that Camera? Its simply just my iPhone 4 camera sitting on a small wooden block, with the "HDR" photo setting turned on. All I do is get some focus on the model, move the light source around until i'm happy with what I see and start snapping off shots- sometimes the HDR gives better detail shots, other times it might wash some colour out, so it gives two photo versions to select from.

Anyhow, less talk more pics- here's the comp entry photos that I ran with.  You may note that I painted a small 'kill marking' on the turret, as the Looted Wagon has so far been able to destroy a Leman Russ Battletank (a few months back at ANUCON), I thought it only fitting that the crew would mark this somewhere. Its not exactly Orky in how it looks but I reckon it looks cool!

I love how the triangular dags on the turret blastshielding look three-dimensional, even though its just painted on.
A closeup of the turret, showing the Killa Kan "pogo" legs that I used as recoil suppressors.

The competition entry thread will be up a day or two's time (competition committee are generally all UK-Europe based), so make sure to have a look and cast a vote if something takes your fancy!

Thanks for looking!
Tempest :)


Sunday, December 4, 2011

40,000 points of devastation! Apoc Battle Report

Well, it finally happened- on the 26th of last month we finally ran the Apocalypse I’ve been talking about for a while now with seven players in total and a thrown together Ork army being run by Adam and I to even things up. The players and their respective armies were as follows:

Colin- Daemons
Ash- Necrons/Chaos/Renegade Marines
Ross- Hawk Marines
Alan- Imperial Guard/ Space Wolves

And on the other side of the table-

Adam- Imperial Guard (Armoured Company)
Brendan- Grey Knights and Eldar
Me- Dark Angels
Shared Army- Goff and Deathskull Orks

The game was run without any objectives to capture, as we were using straight up Victory Points which proved to be relatively painless as everyone was required to provide two half-point costs listed against each and every unit on their list (including vehicles and transports) so that points could be given to the player that earned them for taking a squad to less than half starting models/ immobilised for vehicles, and also for wiping out/destroying the unit.

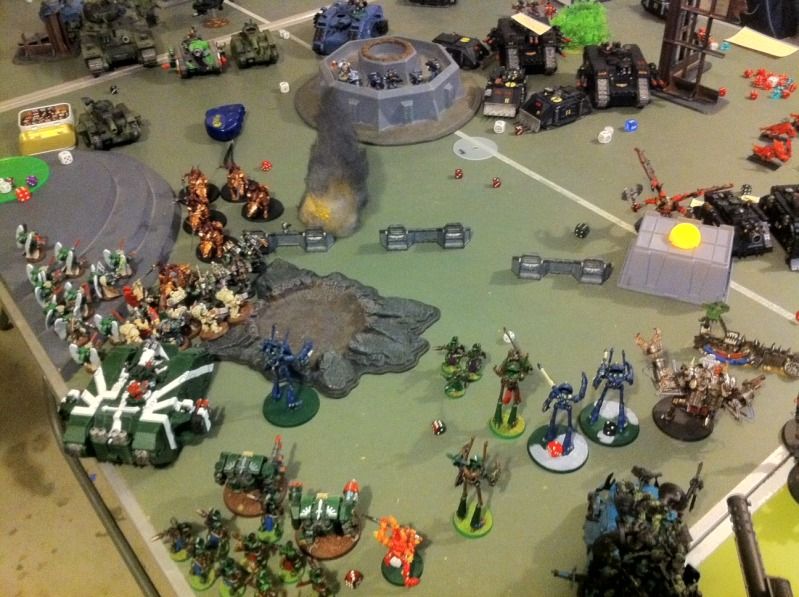
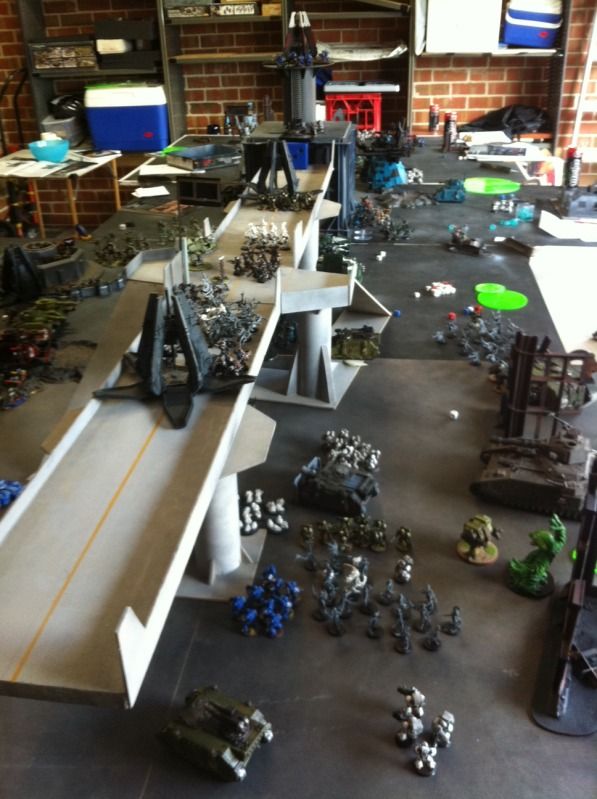
Terrain was laid out in a relatively open manner, with Adam’s landing pad being the centrepiece for the game right in between both forces. The table deployment line was set with standard Apoc rules using the scatter dice and a line to the diagonal opposite table edge, with the ping-pong table side having a very large deployment area and the grey table side a much smaller and more compact area- my team bid 30 minutes for deployment vs 4 minutes for the other boys. They decided to take the larger deployment zone and they put down what they could in four very frantic minutes, with the exception of Ash who was on his way and would deploy in the second turn. On his behalf though, his allies had placed his (made by me!) Doomsday Device up on the deployment line where it could cause havoc. Never let it be said that a flickering LED candle inserted into a ping-pong ball, inserted into a plastic screw container is not threatening...

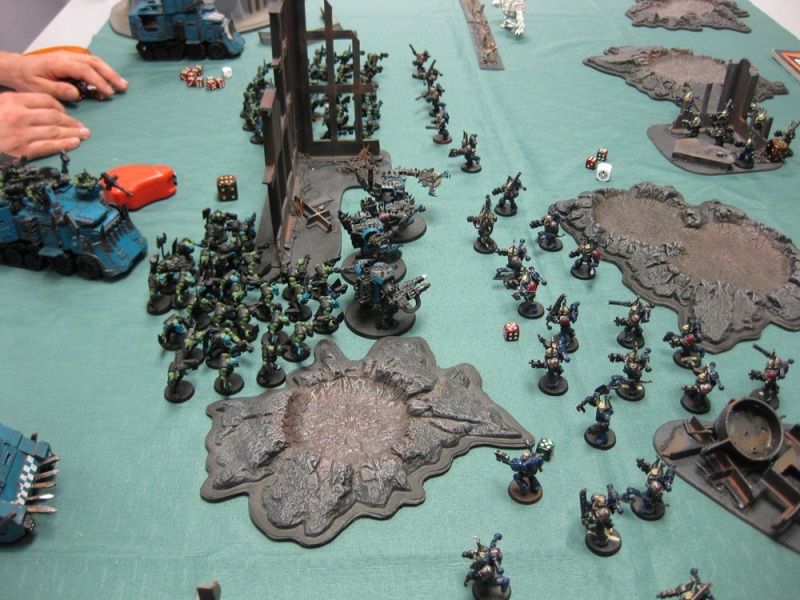
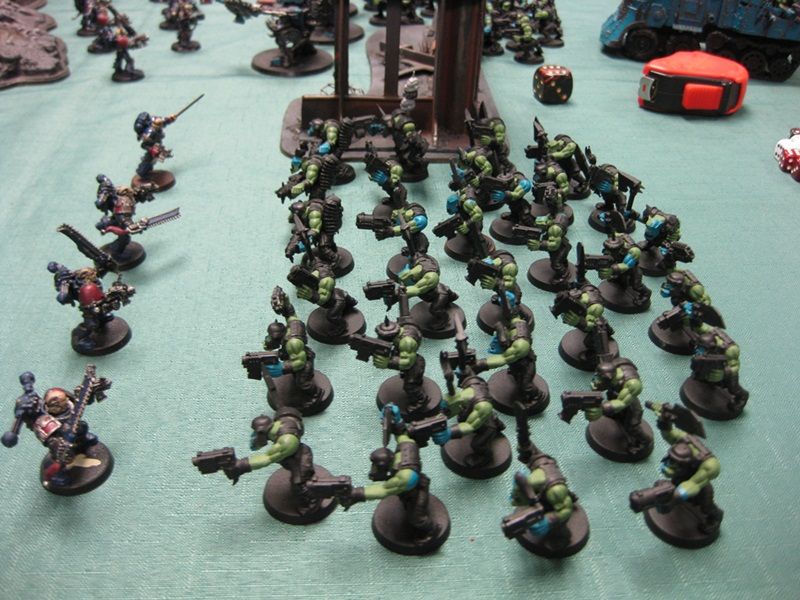
Our team put down everything except for my Dark Angels (sniper scouts did deploy though), all our flyers and Brendan’s Eldar grav-tanks. The main battleline was comprised of two Stompas- each with a Kustom Force Field Big Mek- being placed 2 feet apart, with a full 111- strong Ork “Green Tide” Apocalypse Formation in between them- being infantry they were covered by the KFF bubble giving them a 5+ cover save from ranged attacks! In front of each Stompa was a mob of Kanz, Nob-filled Battlewagons beside them, and a Deff Dread in front of the left Stompa. Behind this front line was row upon row of Leman Russ Battletanks and Demolishers, Chimeras, Heavy Weapons Squads and two Shokk Attack Meks- one in the bamboo trees, the other on the extreme right in the stone fortress with a bunch of Burna boys, and backing all these units up was two Baneblades on the right and a formation of Basilisks on the very back table edge.

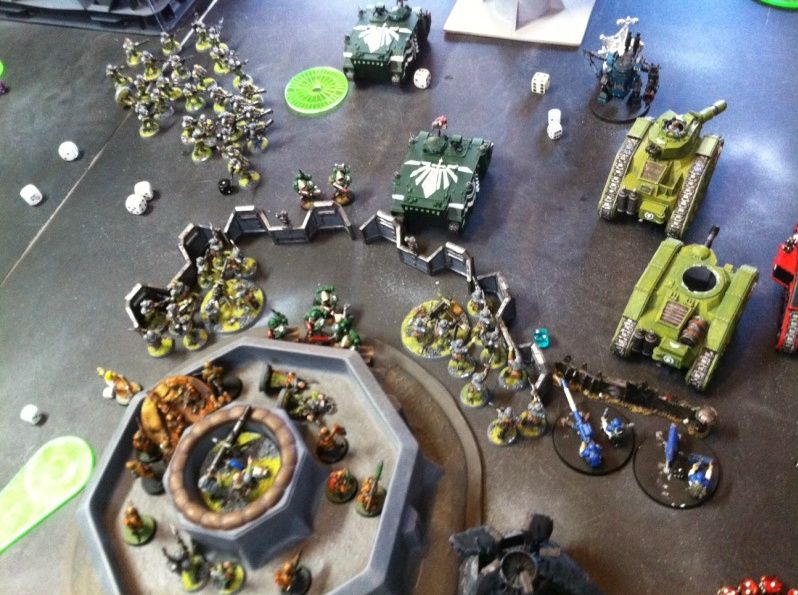
Our opposition had a full complement of Daemons on the left side of their deployment line, in a “Tetragon of Darkness” Apoc Formation, Daemon meaning that whilst the key Greater still lived, all units in this Formation were extremely hard to see/hit, as all our shooting at them would be using the Night- Fighting rules. Ross’s Hawk Marines anchored the middle and the right flank with Tactical-Squad- filled Rhinos, and several Land Raiders, with a small Assortment of Space Wolves, Leman Russ’s and a Baneblade, with a scary back-line made of Basilisks and a single Deathstrike Vortex Missile Formation (Alan plays for keeps in Apoc!)

And so without further ado, here is the turn by turn rundown of the incredible destruction, heroics and sacrifice that made this such a phenomenal battle!

Turn 1:

•With all launch protocols satisfied and with the Lord Commisar’s approval the mighty Vortex Missile flies skywards on a trail of fire. Arcing downwards it explodes next to an Ork Stompa, destroys an IG Command Squad in their Chimera as well as vacuuming up a Battlewagon with its full complement of “Deathstar” Nobs and their Warboss! The resulting Vortex template that remains spends the rest of the game wandering around randomly eating Leman Russ tanks, scaring famed Chaos Warlords and blocking unit movement.
•A squad of screamers breaches the disruption field and destroys 3 artillery vehicles on their next turn.
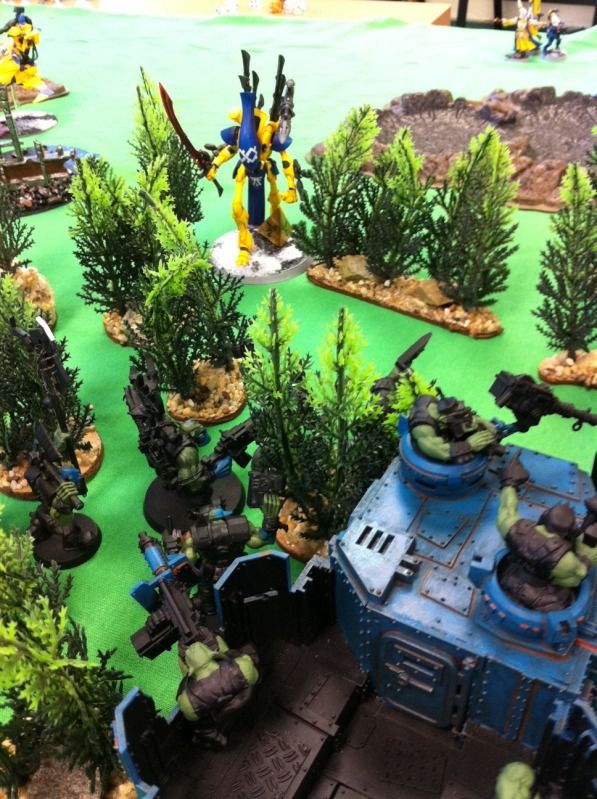
•The Dark Angel Sniper Scouts joined up with the Ratlings when infiltrating deep in the enemy backline to harass the Deathstrike and Basilik artillery guns and the squads guarding them, with an unofficial contest starting up to see who would make the most kills.
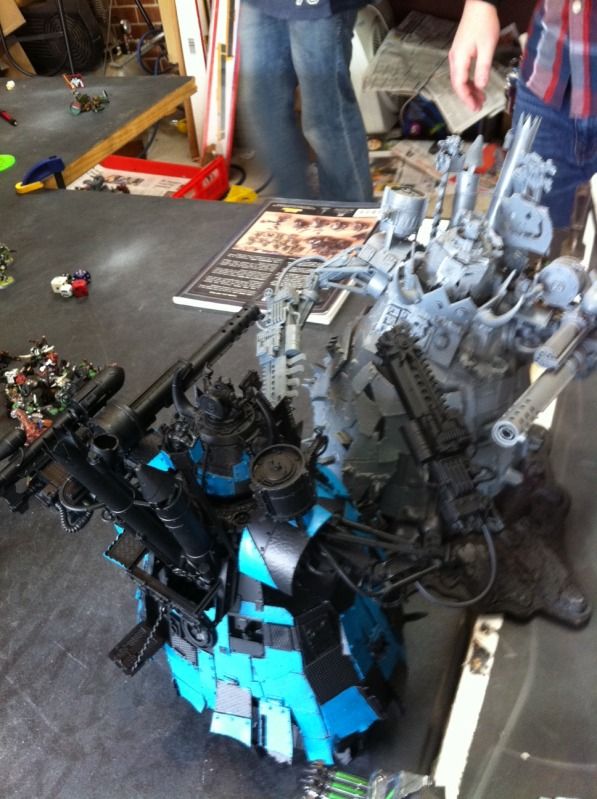
•The Goff stompa poured out more than 70 shots from the psycho-dakka blasta, killing Ku’gath Plaguefather and nullifying the tetragon of darkness. The Deathskull Stompa followed suit with 60 plus shots into the tactical squads in front of it, wiping out two of the three and sending the surviving Sgt fleeing in his Rhino in the next turn.
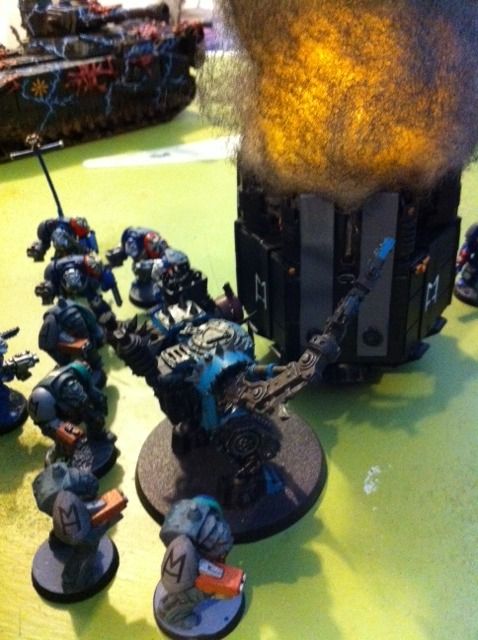
•Seeing the main landing pad in front of them as a hindrance, the Linebreaker Formation of Vindicators annihilate the installation, leaving only a smoking flaming set of craters, opening up lines of fire and setting the stage for the most brutal of close combats.
•Commissar Yarrick and an entire platoon hid away inside their tanks for an entire game! What a Hero...
•A unit of Deathwing teleports deep behind enemy lines to shoot up the basilisks, blowing up one.
•Due to limitations on deployment space, the Marine Hawk Landraiders (particularly the Terminus Ultra) and the Razorback were all out of range in the first turn – a tactical disadvantage as the first turn was theirs to fire away. This meant that five twin-linked lascannons and three single lascannons missed a turn of firing with a large mechanised Ork horde closing in.

Turn 2:

•The Marauder Bomber lines up its run but is forced to disengage due to the heavy screen of AA fire streaming up in its sector.
•The Deathknell Orbital Strikforce lands to the right of the Goff Stompa, a full complement of 50 Terminators and a Dreadnought.  They were initially targeting the middle of hte Green Tide, but were sent off course by the Disruptor Beacon just behind the Ork lines.
•The Last member of the Platoon Command squad guarding the artillery up the back takes a Rending shot through each eye from the Ratlings.
•Sly Marbo appears to deliver some C4 pizza to the Deathwing, killing four of them. He is then shot into pieces of dogmeat by the Stormbolter of a vengeful DA Terminator Chaplain.
•An IG Veteran squad wander out of their Valkyrie, fail to hit anything except TKing half their own squad with a demo charge, but finally manage to destroy a Leman Russ in assault before being virtually wiped out.
•A lone Dark Angel Predator Annihilator rolls up on the right side table edge to engage Abbadon’s Land Raider but fails to penetrate with its main lascannon turret. It was then swiftly destroyed by a swarm of scarabs that ate through its armour and reduced it to a smoking hole-riddled hulk.
•The DOOMSDAY DEVICE (must be capitalised!) becomes “active” but doesn’t bring any effect out just yet. Unreasonable demands are made that our team hands over all our Blue Cheese or the Chaos Lord will visit ruin upon our world. We resolve to just destroy the DD and hang onto our delicious dairy products... 
•The Orks start laughing and pointing to the sky, where several massive flaming shapes can be seen- giant asteroids pulled into orbit by tracktor beams. However the massive Roks miss the battlefield by a wide margin, denying the greenskins the devastating strike they were hoping for.
•The Ravenwing Landspeeder deepstrikes next to a Baneblade and opens up with its Multi-Melta, destroying the super-heavy’s main gun before being destroyed by retaliatory Leman Russ fire.
•Azrael, Belial, the Terminator Chaplain and a Squad of Deathwing engage the Bloodcrushers, supported by a mob of Stormboyz and a Dark Angel Assault Squad led by a Company Master. The  Bloodcrushers are wiped out with only a few casualties from the Assault Marine squad
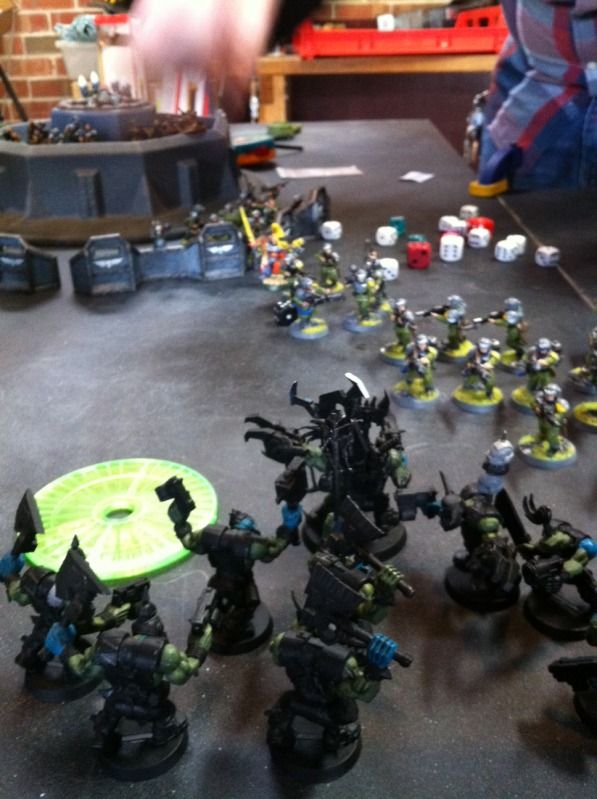
•The 100+ strong Green Tide Ork mob smashes into the daemons in the cratered ruins of the landing pad, dealing out over 350 attacks on the charge to the three units they engage, as all of them are in range to get their attacks and only a few boyz are lost in to the Daemons first strikes! The Daemons are severely depleted but there are more queuing up behind them for a go... the ladz care not- WAAAGH!!!
•Another swarm of scarabs eat through the armour of one of the Baneblades, reducing it to 0 AV and the tank is destroyed.
•The Dark Angel Assault Marines are caught in a blast from the nearby Baneblade’s Demolisher cannon, wiping them all out except for the Jump-pack Company Master who survives thanks to his Iron Halo. Realising that the warmachine is out of his league he goes hunting infantry instead.
•The Daemon Prince and Greater Daemon assault one of the Shokk attack Meks and his burna boyz, turning the mek into a Chaos Spawn in the process. They are only destroyed later on by the timely intervention of two Grey Knight Dreadknights. 

Turn 3:

•The Dark Angel Company Master leaps into the central bunker to assault and wipeout a squad of Long Fangs, but only just survives with one wound remaining.
•The techpriest enginseer charges in against the scarabs to save the second baneblade, but gets eaten. Its all those delicious augmetics... nom nom nom. Thats 1000VPs earnt by the one small swarm alone!
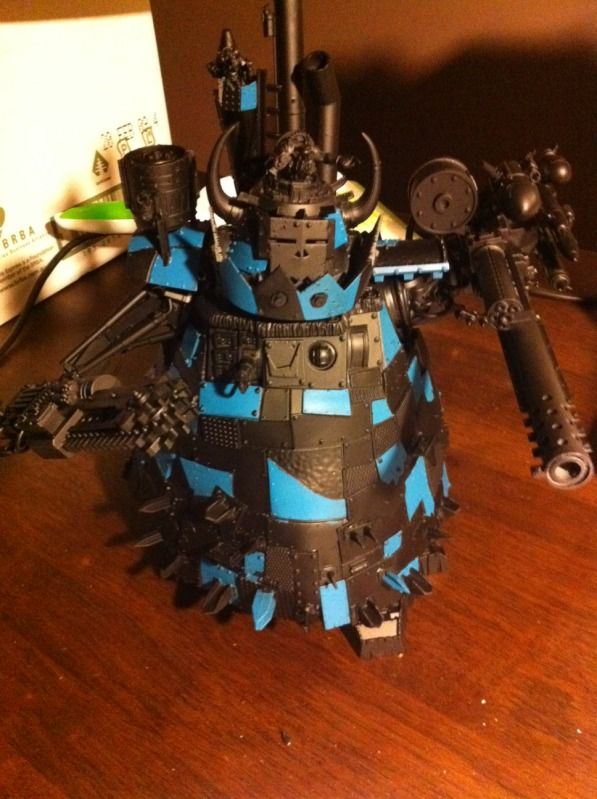
•The DOOMSDAY DEVICE sends out two giant beams of death, striking both Stompas like hammer-blows- the Deathskull machine is immobilised and has its Deathcannon destroyed, and the Goff Stompa is reduced to two structure points. In the Ork’s turn the Deathskull Mek waltzes out onto the arm and beats it with his wrench until it powers up again.
•The Dark Angel Devastators and Whirlwind were deployed in a position behind the main Ork battleline waiting for the expected Daemon breakthrough, but never had any chance to hit enemy units as the swirling combat in the centre continued on for three full turns as the Orks refused to break and just continued crushing everything thrown at them.
•The Goff Stompa charges in and carves a Chaos Fellblade in half, the explosion taking out several nearby renegades and Necron warriors. It is finally destroyed by a squad of Terminators, its own explosion taking one of them out.
•The three armoured sentinels behind the Deathskull Stompa open fire on the Linebreaker Vindicator squadron, destroying one and stunning the others with one round of shooting, achieving a result where the rest of their comrades had failed previously.

Turn 4 (Last Turn- time constraints):

• The demon princes that got scattered on deepstrike arrival end up killing the chapter master of the Grey Knights and destroying a Stormraven.
• Azrael, Belial and the remaining Deathwing engaged Logan Grimnar and his Wolfguard, with both sides fighting to a draw as the game ended.
•A Squad of Veterans jump from their valkyrie, shooting the baneblade with three meltas and destroying it, stealing the VPs from the Fire Dragons who were too busy reloading their guns!
•The Dark Angel jump-pack Chapter Master attacks a nearby Landraider, strapping a meltabomb onto its hull and immobilising it in the explosion.
•Massed Leman Russ, Demolisher, Conqueror and Chimera firepower finally wipes out the last of the Deathknell-Formation Terminators
•Abaddon and his squad deigned to grace the pitiful mortals with his presence, leaving his Landraider finally! However, a Shokk Attack gun and some IG heavy weapons teams culled his entire squad and knocked him down to just one wound. He also spent a nervous turn watching the Vortex template disappear and then reappear beside him.
•Changeling saving Ku’ros Fateweaver from being charged by some nobs by making them shoot a Killa Kan instead.
•The deff dread in the centre loses a combat arm and its skorcha, then advancing between two burning vehicles to destroy a necron squad in close combat.
•The Marauder finally makes an appearance, having previously turned back due to long-range Ack Ack fire, it drops its full complement of bombs on a squad of Necrons Warriors and some Daemons, blowing them into small pieces.
•One lone Tzeentch Flamer survives two rounds of combat with the grey knights squad that killed the rest of its squad, beating all the odds!

The Result:

So, the final result was a win for my team, with 11,220 VPs, and the opposing team ran up 8271 VPs, a very decisive victory no matter how you look at it! 
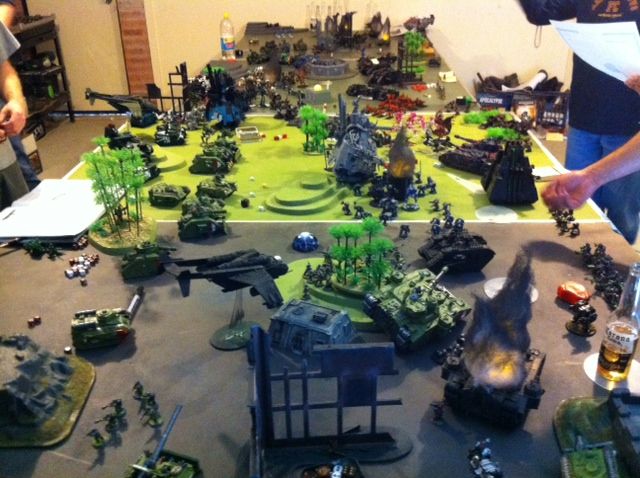
Photos!

Here’s an assortment of pictures from the day, showing the insane scale and destruction that a 40,000pt battle entails:


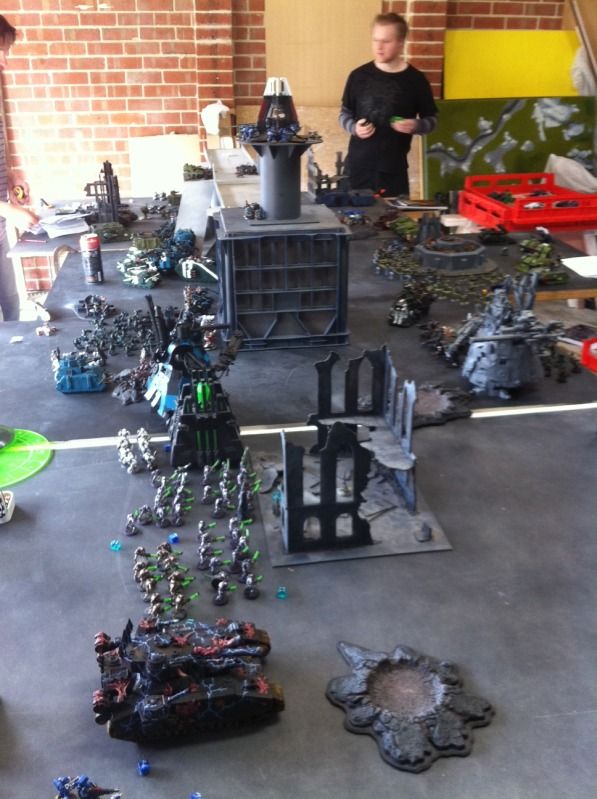
Our team's deployment line
110 Boyz and a Warboss- Greentide!
The Linebreaker Formation annihilates the landing pad!
Deathknell Orbital Strikeforce teleports and drops in after a massive lance strike to clear the ground.
Da Ladz suss out the competition, but ultimately decide to go Daemon bashing! 
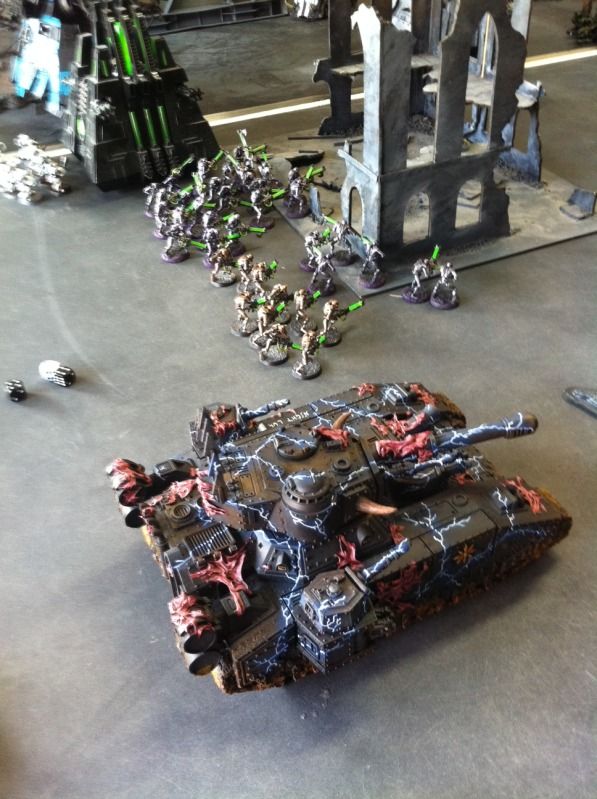
Necrons and Chaos deploy after being initially delayed.
Abbadon declares his intentions to all and sundry, presses the big red button and the Doomsday Device powers up! The Bloodthirster appears impressed!
New-codex scarabs vs Baneblade- 600VPs to the small metal swarm after eating the superheavy to pieces.
The Greentide about to crash into the Daemons, with the two Stompas hosing everything with their Supa Gatlers
Flyers strike deep behind our lines
the Kan decides to destroy a Drop pod as a last act of defiance before the Terminator's crush it to bits! (My flaming wreckage markers worked so good- flickering LED candle hot-glued inside pillow stuffing, with black spray on the outside!) 
The stompa scythes the Chaos Baneblade "Storm Of Chaos" into ruin! 
The Bloodcrushers are assaulted by the Dark Angels and a small unit of Stormboyz, whilst the Wraithlords and Deff Dread advance on the Doomsday Device.
The Assault Marines, Dark Angel Lords and Deathwing plan their next move.
The Marauder finally appears, weaving through the smoke-filled skies to deliver a huge payload to the Necrons and Daemons below. The very left flaming wreckage is the remains of the Linebreaker squadron.

The raw numbers...

And a couple of graphs showing the end VP results- the battle for MVP on the other team went down to the wire and was only won by Alan by a margin of 39 points!! And its obvious to see why my team won this battle- the Orks came storming out of the gate from the start and kept pouring on the death, culminating in a massive 1700+ VPs haul on the third turn alone (which is more than my Dark Angels scored all day!)

So what next?

Well, seeing how a lot of people are going to be tied up over the next 4-6 weeks with Christmas, New Years and things like Cancon its looking unlikely that there will be another Apoc until at least mid- to - late February. This in itself isnt a bad thing, as a few more people should be available to participate in the next game, and the returning players should have that extra time to complete new units or paint up what they have. It also gives me some time to build a nice shiny centrepiece terrain structure for the next game, i'm thinking of a large Manufactorum or Ork Fortress.

Tuesday, November 22, 2011

My new 'Games Room', Dark Angel progress and Apoc preparation.

Games Room- aka 'The Garage'

So I’ve managed to completely clean out and rearrange my garage just last weekend, in preparation for an Apocalypse battle at the end of this month. For the last three months it has actually looked similar to Junkion, or even the trash compactor room from the first Death Star, minus the water (although there was something living in there I’m sure). But with a baby on the way we went into cleaning overdrive, to make sure nowhere in the house could be a breeding ground for mice or other nasties, and I now have a fairly pristine vehicle storage/ gaming retreat.

The garage itself is a two roller door setup, 20 feet deep by 21 feet wide. The entire left wall has our old kitchen cupboards and benchtop on it, cut to fit around the brick pillars every 6 feet, and the whole lot is bolted to the wall. At one end of this is a metal shelving unit for all my car and household products, at the other is my steel workbench. The workbench has storage for my hundreds of spanners, tools and other bits and pieces. It’s here that I cut, shape and build all the crazy terrain and other stuff... the old kitchen bench assembly has 4 double-door cupboards that I have all my terrain and power tools stored in. The benchtop itself is awesome for lining up armies prior to game deployment- my 4000+pts of Dark Angels takes up about 1/6th of the space J

On the other wall I’ve installed some large swing-latches that pivot up and down to let me store up to 3 game boards flat against the wall (takes up no space this way, and is ultra safe). For large games like this I’ve also got an old futon (couch) that I put on this side for people to relax on.

Next modifications and additions will see a small air-compressor under the bench with a retractable overhead airline reel, several power outlets above the benches and larger multi-globe lighting banks on both sides of the garage, with dimmer switches to adjust the brightness. I’m still hunting for a small stereo to put into the top of the large cupboard on the left, with speakers in all four corners and a small fridge in the space between the workbench and the cupboards. Another future addition will be carpet- our house is getting new carpet soon, so the old stuff is going into the garage!!

Certainly beats playing at the LGS if you ask me- aircon, cold drinks, room to move and setup.

All in all, buying the necessary hardward and equipment at Bunnings and Supercheap Auto, and factoring in the recycled kitchen, this setup owes me around $200? Maybe not even that. Extremely versatile, and room for some seriously big games or convoluted table layouts.

Dark Angels- progress report.

With a load of Space Marine bitz coming through the mail recently i've been able to construct the complete Devastator squad I was after for this game quickly and easily. Although the initial outlook was for a power-armour spamfest, it now appears that there will be some Eldar and Imperial Guard being fielded, so my 4x Heavy Bolter Squad will be used for this game. I do have the choice of running Plasma Cannons (4 if i want to), but we'll see how i feel on the day- I may end up making a last minute change if i feel the PCans will be more effective.

I've also completed the basic construction and undercoating of two Tactical Squads as well, who will be given whatever Heavy Weapons aren't fielded in the Dev Squad, as well as Flamers for Special weapons- this is something new for me! The Sergeants have been given power weapons, and one of them also has a plasma pistol for some extra short ranged punch.

In regards to my construction of the units mentioned above, i've put the entire model together but have left the arm/gun assembly off. This allows me to paint up the chest/aquila sections of the model before the guns go on, which is a simple task seeing how i glue the left hand under the bolter front grip while tightly pushing the top of the arms against the shoulders of the mini where they mount. When the glue dries this means the whole gun and arms are in one ready to glue on piece, and I can paint up both arms and the gun as one seperate unit. I've even painted numbers on the inside of the arms on the mounting point that correspond with a number painted onto the shoulder of the mini so that every arm/guns assembly goes back onto the mini that I glued it up to fit. The same thing goes for the Devastators- their guns and arms are all pre-glued together, and slip into place neatly, with all the power cables to their backpacks lining up perfectly.

While this might sound a bit overkill for most people, its something i've done before during my construction and painting process that guarantees that everything goes on the right mini and is easily painted up in pre-assembled 'blocks' instead of small fiddly arms and bolters as seperate pieces.

Apocalypse Preparation- table layout sorted...

Getting there!


So here's the table for the game on the weekend (although im yet to raise and properly level the last 6x4 section, and there wont be a large wood bit sticking out the end either), im happy with this long layout, it should comfortably handle the 40,000 points that will be brought along. And once the benchspace (in the background) is cleared off there'll be stacks of space for armies, casualties and all those other things that are needed in a large scale game. So happy with how this all turned out, considering the quagmire the place was a week ago.

The long things on the table are strips of cheap grey fabric that I use for roads- they're spread out to remove the wrinkles since last i used them. Seeing how this will be a fairly open battle i'm planning to have a fair few roads around the place to allow vehicles some extra movement- big fast armoured assaults are always great fun :) I have about 8 of these strips of cloth, and they generally get held down at various points by small pieces of gaff/ masking tape.

Got a couple more hills in production for this game! More raised up 'three dimensional' stuff to break up line of sight will be good, and there will only be a few clumps of ruined outposts or intact buildings- this is a titlefight out on the (relatively open) plains...
So thats all for now. Hopefully i'll have the Apocalypse post-mortem up not too long after its all done and dusted, so until then be good!

Tuesday, November 8, 2011

New Dark Angels & November Apocalypse

New Recruits

Up to now my current Dark Angels army has exclusively used the robed veteran models for the three Tactical squads and one Assault Squad, however I felt it was time to diversify and pad out the army some more. With a minimal budget, some small purchases and a bunch of left-over marines I’m hoping to nearly double my power armoured numbers.  

So what are the left-overs? Well I came across a whole bunch of assembled power-armour marines that were left over from the small (1000 pt) Ultramarines force I built when I got back into the hobby around 6 years ago. These are effectively the current multipart Space Marine miniatures that you can buy in the Tactical/ Combat Squad box set, and in all cases they’ve been assembled with arms on but without bolters in place, this makes it quite easy to then paint the chest Aquila section. Some were bare plastic, some were undercoated black, and two had been used to test colourschemes. Three were actually done in a very muted Dark Angels colourscheme already which i could have salvaged, but i decided to just re-undercoat them so they appear identical to all the others.

There is also a further five robed veteran models as well, which I never got around to using- they have been assembled and are awaiting weapons. At current I have ten 'normal armour' and five 'robed models', however there is enough arms, heads, arms, weapons and spare parts left to easily make another twenty standard power armour marines, at least once I buy some legs for them- its the only thing I don’t have, so I’ll jump onto eBay soon and get something sorted. Im thinking of using a mix of assault legs as well, for that aggressive running feel.

With a huge range of spare Dark Angels bolters, helmets, backpacks and small paraphernalia I’ve been able to make the current vanilla guys look like true Sons of the Lion, and they’ll obviously receive the same green paint-scheme and techniques as their robed counterparts. I’ve made sure to glue some spare loincloths on some of the minis as well, these will be painted in the same way as the robed models, helping tie the robed and non robed guys together with another common colour. I’ve also purchased and stockpiled a load of the Dark Angel Veteran shoulder pads that have the raised sword molded onto them- this way all the marines in my army will have identical chapter symbol shoulder-pads.

The new minis will ideally be arranged into a five-man Devastator Squad- two missile launchers, two heavy bolters and a Sergeant- and three full ten-man Tactical Squads, with two Plasma Cannons and a Lascannon. The cool thing is that I already have two other Plasma Cannons in my current Tactical Squads, so I can field a full 4 x Plasma Cannon Devastator squad if the need arises. Anyone that’s used one of these (or faced one) knows that the risk of overheating death is a fair price to pay considering the phenomenal firepower that it can deal out, entire squads of power armoured foes can be annihilated with a few well placed shots.

With these new models I’m going to start branching out a bit more in regards to weapons and wargear loadout, with two Flamers and another Meltagun being the special weapons for the new squads and I’ll possibly give the sergeants power-weapons- mauls or swords- as a compromise between the standard (and free) chainswords and points heavy powerfists that I have now.

Once all the minis are done up, I‘ll then have to work out whether I need or want to paint up another 3 Rhinos for them, which will obviously need to match the ones I have painted up now- am I a dedicated Disciple of Caliban, or just a sucker for punishment?

The hope is that I can have all these new squads assembled and basecoated in time for the upcoming Apocalypse on November 26th. At 5000pts per player I’m going to need every last man I can get!! However, it will be nice to field an army for once that's all from the same Codex (if you ignore the Baneblade). 


November Apoc!! Possibly 30,000pts.... maybe more!

And on that small topic change, yes there will be another Apocalypse game coming up, this one to be held at my place this time (all previous ones have been at mates’ places). This game will most likely be played across a game surface comprising of my Table Tennis table with one or two 6x4 (regular size) game boards on the ends. So the end result will be a table with a length of either 13 or 17 feet, depending on what I can fit in the garage, which will be more than enough for a load of carnage. We are looking to run with around 6 players, although we could happily accommodate 8 if needs be, although I reckon it’ll end up quite cramped like that.

As previously mentioned, we'll be trying to get each player to field 5000pts, and for the first time ever we'll be having a game without any objectives. Yep, there is no strategic plan in this game, save that you kill as much of the opposition's forces as possible. We're going to run this game based on VICTORY POINTS!! Some would say we're mad, but then again I think the idea we have is workable. The following points outline how it will work-

  1. Everyone brings a printed army list as usual, but includes the two half-points values of the unit in brackets as well as the full points. For example- "Tactical Squad- 10 men- 190pts  (   95   /  95   ). 
  2. At the end of each shooting and assault phase, scores will be added up regarding units that  are reduced to half strength or destroyed, the constantly accruing "score" will be displayed on the wallboard in a table to track progress of points acrued per turn, and broken down into seperate shooting and close combat sections. This will allow me to turn the data into some cool graphs later, but should also make it easy to record all the casualties, which might be hard to remember after a full team turn (there is going to be so much carnage!)
  3. The owner of the units that have taken damage will (when providing the points costs to the other team) cross out either one or both numbers on their list to keep track of what remains, or circle them... whatever works for keeping track.
  4. In close combat, units can be damaged or lost by both sides in either player turns- any close combat victory points accrued by the team who is awaiting their turn will be added to their next-turn CC tally.
  5. As expected, at the end of 4 or 5 turns, the winner is the one with the most points. We'll most likely call within 10% a tactical draw, anything outside of this is a definative win!!  
Being that the next game is at my place, and I wont have to pack up too early we'll most likely be able to remove the turn time-limit restrictions, kick back and relax while watching the Victory Points go up and model count go down..... in practice it might be annoying, but im hopeful. 

As a final note regarding Apoc- the original idea from earlier in the year was to end up conducting a massive “Mega Apoc” where everyone would come along and bring everything they had, however this is still proving hard to co-ordinate, as working around peoples availability, army/miniature limitations and even finding a venue to hold it in is proving to be a huge task. A lot of recent discussion has produced some excellent ideas concerning speeding up gameplay, streamlining flyer rules, reserves, using movement tray bases for infantry models etc, so once we have the rest sorted out the game itself should run quite well. So for now the “Megapoc” remains a bit of a pipe dream, but I’m hopeful that one day we’ll get a game like this off the ground. If anyone out there has any “big game” suggestions, I’m very keen to hear then.   

Wednesday, October 12, 2011

October Apocalypse- Carnage on a Massive Scale!

Last weekend saw us finally get around to running the Apocalypse after much banter, lead up and preparation. For anyone who has coordinated one of these, trying to strike a balance between forces, participant skill levels/availability, terrain layout, deployment lines, objectives and all the other little things can be a massive task. Further complicating this is when you want to run a “fun” game, or introduce balancing mechanisms.. (see my previous post in relation to what we put in place and the ins and outs of all that)

For the record, this is the two teams and what they fielded- forces and superheavies:

·         Alan-    Space Wolves and Marauder Bomber
·         Adam- Goff Orks, Imperial Guard and Stompa
·         Colin-  Daemons from all four Ruinous Powers!

And on the other side of the table,

·         Ash-  Crimson Fists, Vanilla Marines, Necrons and Chaos Baneblade
·         Jeff-  Ultramarines, Salamanders and Baneblade
·         Me-   Deathskull Orks, Dark Angels and Stompa

So, with six of us ready and raring to go and a table loaded with fancy terrain (really? Oh wow :P) we got stuck into it! Once underway the dice were flying thick and fast, squads started moving, drop pods fell from the sky and the bodies started to pile up. My team took the central objective with my sniper scouts infiltrating, and Jeff successfully landed two drop-pods on the raised highway either side of the junction objective and one on the central objective as well, high up on the landing pad! Ash’s Necrons surged forward to cap the third objective out on our right. Thats basically all I remember regarding turn sequence, the rest of the game then rolled into one carnage filled extravaganza, where shield generators turned aside insane firepower, scheduled bombardments took out friend and foe, and insane bravery was the order of the day (well, at least on our side in the last few turns!). The following points below are the major upsets, kills or events that I remember from the game, as well as some provided to me by the other boys on the day.


My Shokk Attack Gun Ork Mek fires a double 6 and “hit” on the scatter dice, first shot of the game. This “Removes from play” a massive chunk of Imperial Guard, and puts a target on the poor guy for the rest of the game. He eventually cops an attack from a Valkyrie firing krak missiles on his position.
   
The Sniper Scouts and the Tactical Squad that drop-podded onto the central objective building sat there the whole 5 turns taking fire from artillery, orbital bombardments from ships above, heavy weapons companies on the ground and many more. Not once did either squad break, with every break and pinning test passed, these guys generated loads of objective points for our side. The final sniper scout died after a massed assault by a horde of Chaos Furies.

Both stompas used their “super gatlers” to mow down at least 30 opposing infantry around each other’s feet- these guns keep spraying 2D6 Str7 shots from one squad to the next (within 6”) until a double is rolled... insanity! I hit about 9 squads in total, Adam did a bit more IIRC.     

Second turn, my Callidus Assassin (the mini is the old “Imperial Assassin- so he’s a guy!) pops up next to Logan Grimnar and kills him and his one remaining Terminator Wolfguard in close combat/nasty shooting (the others had died to massed Plasma Cannon fire from a Devastator Squad). He then chases down and annihilates a further squad before being capped by an Imperial Guard heavy weapons squad. Best 135pts i’ve spent in a long time, i now owe him a flash paintjob!

A Salamanders captain and Scout squad drop-podded into the enemy lines, in the midst of a carpark full of Imperial Guard artillery tanks, they sowed confusion and anarchy for several turns before being gunned down.

Multiple Greater Daemons and Daemon Princes teleported behind the line, killing great swathes of power armoured squads in close combat. A small group of nurglings holds up a tactical squad in combat for three whole turns, and then the Ork mob near the bridge take 17 casualties from a single Apocalyptic barrage from in orbit....

An Imperial Guard Veteran squad Deepstriked onto the right flank ruins objective and only died after being shot at for two turns by a squad of Grey Hunters, 2 Devastator squads and the Chaos Baneblade, clawing some points back for their team.

Ragnar bails out of the BA Stormraven Gunship (mine, on loan to Alan), throws a Vortex grenade at my Dark Angels Landraider. The Vortex eats the LR, and Belial + 5 Deathwing in one gulp (625pts!!). My Ork Warboss and has mates then counterattack Ragnar and his Squad, Ragnar runs away really fast after he loses the entire squad he was attached to! Unfortunately for my side, the Wolf Lord could not be brought to justice. The vortex goes on to destroy several more Tactical Dark Angels, a Venerable Space Wolves Dreadnought and a couple of Orks before vanishing.

Both Ork Stompas on each side engage in violent and clanky close combat and systematically shred off each other’s guns, deal out drive damage and effect shaken and stunned result. Adam’s Stompa eventually dies when the Necron Nightbringer engages it in close combat and it explodes violently, taking some of his Orks with it! My Stompa remains locked in place immobilised with nothing but a close combat arm flailing wildly and a big burn on the front from the other Stompa’s ‘death blast’....

Hordes of Daemons from each of the four Chaos powers materialise on the bridge and go toe to toe with Scouts and Tactical Marines of the Ultramarines, Dark Angels, Salamanders and Crimson Fists for the junction, no one can gain an edge for 3 rounds and the junction provides no points to either side. On the last turn the Ultramarine Captain engages Kaeros Fateweaver (being played here by a ‘Doom’ CyberDaemon), and stabs it once, forcing a save that he fails- his failed wound forces a leadership test to see if he can teleport out of trouble, and he fails and dies as a result!

Scheduled Bombardment, then Orbital bombardment on the ruined building objective out right where the Necrons were concentrated, the casualites were way too high and the entire Necron force phased out after some surprise Manticore bombardment at the end. This took 20+ Necrons Warriors, the Nightbringer and a Monolith off the objective and opened the right flank up considerably.

 In the last few turns of the game, every single squad on our side passed every leadership based test required of it- could not be pinned, broken or fail a thing. This gave us the edge in terms of squads contesting or holding objective points, or being able to concentrate firepower to kill enemy units

And, some pics of the aforementioned carnage...

Our turn one, the horde advances whilst Colin ponders his next Daemonic move.

Ash's beautiful Chaos Baneblade anchors the right flank.


The raised highway, leading to the main depot building (aka the pimped out Milk Crate). This terrain worked better than expected! 

Waaagh!! Stompa v Stompa.

Alan pie plates the opposition into paste. The Marauder is on the left, about to bomb the Necrons all the way back to their tomb world.

The Warboss and 'his ladz give chase to Ragnar after chopping his pups into pieces. The green template in front of them was actually the Vortex Grenade that killed Belial, the Deathwing and the Land Raider!!  

No matter the cost: The Dark Angel tactical squad refused to break under fire, its remaining members barrelling through the guard lines to assault the enemy Commander, who was slain in close combat. 


So, what was the result of the game?

With the “rolling score” (constantly accrues- see last blog entry for details) and the bonus pts on offer for killing opposing commanders (the closer the more points!), the result was 23 to 15 in favour of my side. The other team had an amazing comeback with a few commander kills and pushing us off objectives late in the game, but the last couple of turns for us saw two close-combat commander kills (both very much against the odds) to give us an unassailable lead. I think in the next game we’ll seek to start the objective counts from the second turn onwards, as infiltrating straight onto these objectives and gaining the points immediately is a little unbalanced (unless your opponent can react immediately). Im also keen to see people run with more flyers as the Marauder, Vendetta/Valkyrie and Stormraven all did very well at punishing our lines or deploying out troops to capture or contest- in this particular game Alan ruled the skies with an Iron Fist!

I’m hoping that by the next big Apoc game (November some time?) I’ll have some of my Blood Angels up and running, with at least a base coat of Mechrite red on the Stormraven and the NMM gold done for the Sanguinary Guard so they’ll both be playable with some colour on them to distinguish their allegiance.

I hope you enjoyed reading this update, and i'll have more up soon including preperation details for the next game!

Cheers,
Tempest

Wednesday, October 5, 2011

Apocalypse, Contests and Stompa Progress

Hi everyone! Its been massive week for me here at work ,and I've struggled to find the time to put this up.

Apocalypse

This weekend will see another Apocalypse being run at my mate Al’s place, a 4000pt per player affair with key emphasis on a fun balanced game. Everyone’s interpretation of fun or balanced could be different but to me its about taking a balance of infantry and armour, a smattering of heroes, villains, and uber-monsters as well as one superheavy per player. Apocalypse Formations and Legendary Units are great fun and are encouraged, but the big restriction comes in the form of vetoing two “general stratagems”- namely, Flank March and Strategic Redeployment. These two stratagems are potential game winners with the right forces, and seriously unbalance the game to the point that it becomes hard to claw back a victory after this is used against your team. We’ll either go for randomly drawn stratagems, or people can select from the race-specific stratagems as found in Apoc and Apoc: Reloaded.

We are also going to work with a 40- 45 minute per team turn limit (up from 30), this will keep things moving along quickly, and will possibly work with a modified deployment setup where some units will be forced to hold off in reserve- armour, mounted infantry or similar. The scenario is likely to be one where both sides must take and hold objectives (missile silos, central administratum building, power generator etc), with a continuously accruing score. There will also be “bonus” points on offer for killing enemy commanders (most expensive HQ per army), as per the recently updated Cityfight rules in White Dwarf. The table looks roughly like this:

Commander killed by shooting attack from less than 24” away:                   1 pt
Commander killed by shooting attack from less than 6” away:                     2pt
Commander killed in close combat:                                                            3pts
Commander killed by opposing commander:                                              4pts

These “assassinations” and their accompanying points values represent the morale blow to the opponent and how inspired your own side becomes due to the death of the hated enemy- the closer and more heroic/epic/legendary the kill, the greater the points! And, as the game progresses, one side may decide that in order to secure victory they need to pull an all-or-nothing assault to kill one of these commanders, so it means there will be many different priorities to handle in order to secure a win!

All in all, it should be a great game, I cant wait!
     

Contests- 1st and 1st!

I entered two of my previously featured pieces of work- the Milk Crate Ruins and the Shokk Attack Gun Big Mek into the Second Sphere Forum’s “Terrain” and “Vintage Mini” competitions respectively, and much to my surprise walked away with first place in both!! Very happy with how they both did, especially with the milk crate terrain as it a relatively slap-together type affair.

If you haven’t jumped onto the Second Sphere forums then you’re missing out! They can be found in the link listings on the left or at http://secondsphere.org/index.php/action,forum
   

Deathskull Orks- Stompa Progress Report

Okay, so the only real progress so far is the completion of the Stompa, (sans Grot Rigger crewmembers) which is to date the most complex miniature (or not so miniature?) I’ve constructed. The hydraulics on the close combat arm alone are the stuff of nightmares, and I’ve had to add some extra bracing and supports for things like the shoulder guards which in my opinion were going to break off in the fullness of time. Overall however I’m quite happy with the model, and have started laying down some blue, with white and check patterns to appear really soon. The current "mottled" blue application was just to test how the colour looked, i'll be covering around 80% of the plating with this colour, and leave several plating sections to be painted in camo, or to look like stripped off some imperial superheavy or building- I want to have a section of a large Aquilla on one of the '+looted' metal sheets. 


The decision had been made to run it without the “Bossplate” on the front, I think it detracts from the cool riveted plating underneath, and I want to highlight this detail on my Stompa. This also lets me keep the plate for something else- I’m thinking of building a “minepig” mine layer similar to the one found in the Apocalypse book, this will form a nice ‘face’ for it. That or a hinging upwards assault ramp on a Battle Fortress.... hmm.

As always, i appreciate your comments and feedback!

Tempest :)

Wednesday, September 28, 2011

ANUCON 2011 wrap-up and Ork list thoughts

ANUCON 2011 has been run and won, and from what i could gather everyone had a great time- me included! My Deathskull Orks acquitted themselves quite well in their first ever tournament outing, and where things went against me I gained invaluable experience and insight into my choices, tactics and what i should do next time. For the record, my list looked like this:

  • Warboss with Pklaw, Cybork, Bosspole, t/l shoota
  • Big Mek with a Shokk Attack Gun
  • 5 Nobz, with Waagh Banner, all with eavy armour and uge choppas, mounted in a Battlewagon with reinforced ram, 3 big shootas, grabbin klaw, extra armour, grot riggers. Counted as Troops.
  • Boyz x30, with a Nob (Pklaw, bosspole), 3 big shootas.
  • Boyz x30, with a Nob (Pklaw, bosspole), 3 big shootas.
  • Deffkopta with t/l rokkit launcha, buzzsaw (pklaw)
  • Deffkopta with t/l rokkit launcha
  • 3x Killa Kanz- grotzooka, rokkit launcha, big shoota
  • Looted Wagon with ard case, boomgun
  • Battlewagon with ard case, killcannon 
So, the things i learnt were:

Warboss is hard as nails! 5 Powerklaw attacks on the charge is messy for anyone, and the Boss sliced through everything thrown at him, the only time he copped a beating was a Wraithlord hitting him with a Wraithsword Str10 attack which i failed the Cybork invulnerable roll for. Otherwise, the pansy walker would have been cactus! In a mob of Nobz with a Waaagh! banner he's WS6, and the Nobz keep him alive long enough to do serious damage. Very pleased with how he turned out!

Shokk Attack Gun Mek- the one thing i will never do again is deploy my forces or based a strategy with any reliance on the Mek to hold the flank, pin an enemy unit or otherwise. First time i ever used him, he teleported himself and the gun directly into combat with the target he was shooting at, this unfortunately turned out to be a Commisar Lord with a power fist. He got a few punches in but the commisar and friends beat the Mek to a green pulp in short order. Further games saw him miss everything that he shot at (when generating high strength shots), hitting with low strength and generally being useless. I actually blame the terrain available to me in these games, I think on a few of the other boards out there he would have dominated, but most of the ones i got were restrictive and had crappy lines of sight. In his last two games, both of his first shots were his last- double 1s meant the shokk attack gun exploded and "removed from play" everything within 6 inches- what are the odds!! However, for his points, he adds so much flavour and randomness to the game that its hard to say no to him :) If anything, he can still be useful as an area denial weapon/psychological advantage, but its no fun if you dont shoot it now is it?

The Nobz dealt massive punishment to everything they came up against, and while their 'Uge Choppa attacks arent power weapons, they are Str7 on the charge, and a full squad punches out 20 of these on the charge at WS5 (yeah, that Waaagh banner is worth it!). Best moment was the Nobz and Boss annihilating an 8 man squad of Khorne Bezerkers without losing a single man, then casually waltzing back to cap an objective (as they are troops as per the Warboss). Only adjustment i'd make for future games is to throw Stikkbomb launchers onto their Battlewagon, as its cheaper to outfit this once, instead of paying loads for for stikkbombs on each nob and the boss.

The Ork Boyz- as is to be expected, they are the heart and soul of my army, and they worked a treat at the full capacity of 30 boyz. Previously i'd run with 3x 20 boyz mobz, but this only allowed for 10 casualties per mob before the Ork 'Mob Rule' couldnt be used (any mob of 11 or more models is counted as fearless). The larger mobz allowed for up to 20 casualties before i had to go anywhere near a leadership test, and even then I had the bosspole on each Nob for the all important re-rolls when I got below this point.

I have fond memories of one of the mobz charging a squad of Khorne Bezerkers, getting 90 standard and 3 powerklaw attacks- the bezerkers ending up as a fine mist of blood and some tattered rags of flesh, then the boyz swung round to shoot Kharn the Betrayer with 20+ slugga pistol shots, he dropped dead. A Greater Daemon of Khorne then engaged the boyz, who hacked it into pieces with 60+ attacks (didnt even need the pklaw), then they turned around to face the Chaos Dread that had assualted them from behind, the Nob tore it to pieces and the boyz were victorious! WAAAGH!!! < < < Sorry, I couldnt help it :)

Deffkoptas, i had two of these- one with a Buzzsaw (Pklaw) and one without, both had t/l rokkit launchas though. I ran them as seperate units, and to outflank to hit rear armour and assault or tie up artillery, nasty tanks etc. This worked in a few games, but not enough for me to be happy with them used only this way, i'm thinking of running 3-4 in squadrons (as even reduced to one, they can regroup because they are still 25% of original size). Definately more development needed with these units, although im sure they can be useful.

Killa Kanz- lesson learnt: Kanz will not survive close encounters with monstrous creatures!! AV11 gets carved to pieces quickly, and only through sheer luck will they get some hits back, as they are still just WS2. Against standard infantry they can be great, i'd even rate them against a terminator squad, but MCs are jsut a no go zone. In saying that though, the Kanz did end up dropping a Wraithlord in my last game, but it was already wounded and on its way out. When i get more kanz and can tailor the weapons loadouts i feel they'll be more uselful in a specific role, as opposed to the jack-of-all trades approach i had going on for this tourney.

Looted Wagon- my love for this unit increased tenfold. 1 in 6 chance of zooming forwards and losing shooting for a turn is offset by the Boomgun's profile, I obliterated a lot of pricey infantry with this tank (and scoring some great scatter results!). Wont change a thing, excellent value for its points. A second one will be coming up soon, with a boomgun as well, although i'm making Skorcha turrets for both using the weapons found in the Killa Kanz box. Being Deathskulls, i dont need to justify another piece of 'orkified' Imperial technology...

Battlewagons- the big rumbling monsters were the Rooks of my green and blue chess pieces, with the "gunwagon" and its Killcannon dependably slowly crawling 6" per turn and hammering away with its Ordinance gun. The transport Bwagon as used by the Nobz + Warboss was equally as potent, getting its cargo of frothing maniacs into close combat time and again without fail. AV14 front is very dependable, and the 12 side armour really isnt as bad as people might make out. Im still working out how best to use the Gunwagon, as its 24" Killcannon is a bit limited, but the transport wagon is great. Only changes there will be to swap out to a Dethrolla and maybe drop a couple of big shootas.

Okay so you're possibly bored from all that, so here's some shiny pics from the weekend.


Shokk Attack Mek opens his career with a teleport into Alan's Commisar Lord. Not a good opener...


Kanz v Kharn. the Kanz didnt make it :'( as Kharn hits like a MC... doh.

From another angle- the Bezerkers are moments away from their doom... 


The mob that beat down everyone! 


The Warboss and his entourage moved back towards the Battlewagon, waiting for the Wraithlord so they'd hopefully get the charge. Prior to this, they and the Kanz had decimated 10 Wraithguard and a Warlock in single round of combat!!  


As well as the photos shown here, i invite you to take a look at Luke's blog (he was the the tourney organiser). A great selection of pics can be found there, including a couple of my boys which i've included above. The link to the pics can be found here:


As always, i'd love to hear from you if you have any feedback or thoughts on any of the above!

Cheers,
Tempest :)