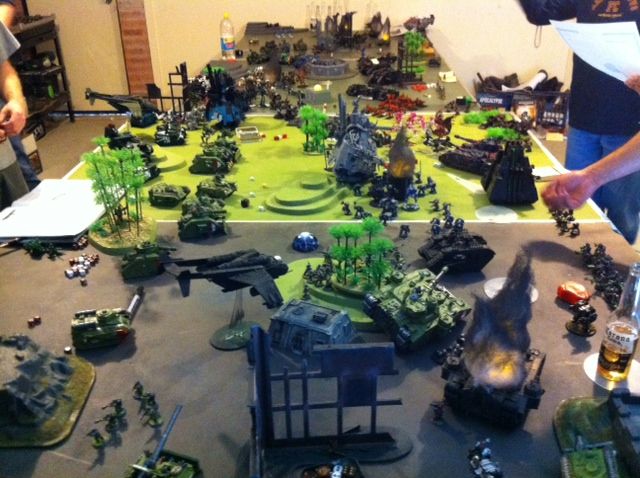
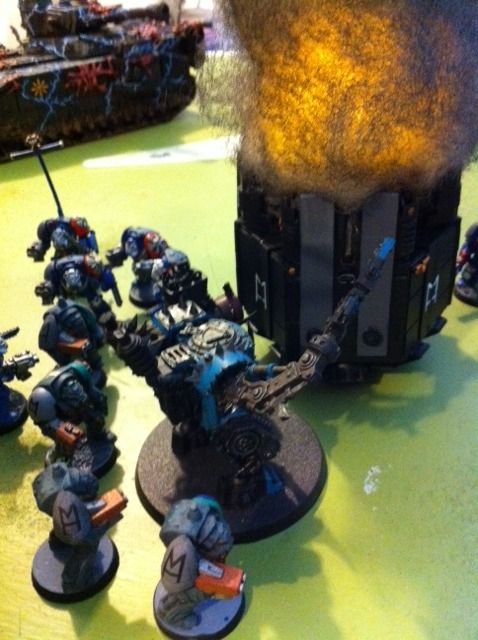
Showing posts with label battle reports. Show all posts

Wednesday, July 17, 2013

Wintercon 2013- Report and Photos


Hey everyone! I'm back now from Wintercon, held here at EPIC in Canberra, after a two-day, five battle odyssey! There were highs, there were lows, and even some middle ground, but all in all I got to roll dice, meet new people and have a great time so nothing to really complain about (aside from having a cold).

Wintercon itself was reduced from three days down to two- although the 40K side of it has always just been a two-day event- however this year the second day was only five games (instead of six), meaning that the second day was a lot more relaxed and we were able to get away relatively early- important when you have a young family as I do. As I'd previously sold off my terrain (well, most of it) as well as my Blood Angels I wasn't really intending to go along anymore, however about 3 weeks out from the event I thought it might be worth a go. Cancon had kind of burnt me out a bit and left a bad taste (Im still not entirely sure why), so I thought that Wintercon might be worth attending to see if it could rekindle some of the love I have for tournament play.

To that end I pulled out what I had of the Dark Angels that werent in pieces/ in the Simple Green and tried to build a decent list that I could semi-complete in time for the 'con. Settled on the list below, based on what I had and what I could build in the time beforehand.

HQ
  • Grand Master Belial- Sword of Silence, Stormbolter

EL
  • Dreadnought with t/l Lascannon, m/launcher
  • Dreadnought with t/l Autocannon, m/launcher 

TR
  • Deathwing Terminators (5)- Assault Cannon 
  • Deathwing Terminators (5)- Plasma Cannon, C/fist-
  • Deathwing Terminators (5)- all with TH/SSs
  • Tactical Squad (10)- Heavy Bolter, Flamer, Vet. Sgt with Power Maul.
  • Scouts (5)- sniper rifles and camo cloaks

FA
  • Dark Talon (flyer)- Rift Cannon, Hurricane Bolters, Stasis Bomb 
  • Ravenwing Black Knights (3)- 1 grenade launcher  

HV
  • Devastators (5)- 4x Missile Launchers

Sadly, in the last couple of weeks before Wintercon I came down with some fairly nasty flu and bronchitis type symptoms, which was further compounded when all my coughing strained a muscle group near my T5 vertebrae- so it was a solid couple of weeks off work on painkillers, antibiotics, throat lozenges, gargles, heat and cold alternating and so-on. At the very least I was able to piece together a five man Devastator unit, a ten strong Tactical squad and complete the base colours on these and my newly constructed Deathwing unit (hybrid of regular terminator box parts and the flash new DW Command arms/torsos/extra bits). If given enough time I would have presented a much nicer looking army but it wasnt to be. Alas...

Anyhow, on to the battles!!

Game one vs. Antonio's Chaos Space Marines + (Traitor) Guard Allies  
Deployment: Dawn of War
Mission: Crusade

We were basically chasing down control of 6 objective markers, each worth 3 VPs. Antonio set up first, and I failed to seize.


Result: Disastrous Defeat to me (tabled)

Highlights:
  • Dark Talon and Ravenwing Black Knights make their maiden appearance, and debuff/own everything in their path, working in tandem. The DT soaks up loads of AA fire from the quad gun and keeps going!
  • Deathwing deepstriking on turn two and open fire with twinlinked to annihilate the Spawn and wound the Khorne Lord. 
 The bad stuff:
  • The Vindicator was unstoppable! Couldnt even glance it with loads of missiles, Las cans and autocannons, so it just kept laying down the huge blasts.
  • My TH/SS Deathwing absorbed huge Plasma fire from the CSMs, a round of shooting from a Vendetta and only very unluckily died to a concerted four meltagun attack from the IG command sqaud that had disembarked- would have been a couple more points in my favour.
  • Similar story for the Tac squad parked up the back- the Helldrake came in and Baleflamed them to death, before destroying my last dread with a merciless vector-strike in the last turn!

Game two vs. Dale's Dark Eldar + Eldar Allies 
Deployment: Hammer and Anvil
Mission: Big Guns Never Tire

Lengthways boards arent the best for my army, which is mainly subdivided into green/white/black portions all designed to work together at close quarters- this was going to be a long table shooting gallery, so I was forced to get up in the Eldar/DE's face to try and get into close range..


Result: Disastrous Defeat to me  (not really unexpected- vehicle heavy list with insane firepower and range. And twinlinked everything, and so on etc etc. On a lengthways board...). Tabled!

Highlights:
  • Scouting RW Black Knights were able to pop open a Falcon underneath Dale's giant Skyshield Landing Pad, using only a couple of Plasma Talon shots. Honestly, that was it- the rest of the time i couldn't hit anything, do wounds or armour pen, and got run around like crazy.... hence the giant list of things that went wrong. 
The bad bits:
  • Table deployment setup and cover was minimal for me, which really made it hard to get any forward momentum going.
  • Eldar Farseers on jetbikes with 2+ cover saves and rerolls and crazy jacked up combat drug-like psychic powers (rampage??)= lots of dead things. Epic.
  • Every Falcon put out a bucketload of dice to hit- most re-rolling, some ignoring cover, some ignoring armour. Had no reply to that!!
  • Deepstriking my Terminators in really wasnt the best idea in this mission- should have castled up or advanced in a large block to the central terrain- all my units got picked off piecemeal at range. 
  • Dark Talon was dropped by a couple of Falcons throwing buckets of Str6 shots its way, had no ral chance of jinking out of it. 

Game three vs. Eddie's Nurgle Daemons
Deployment: Vanguard Strike
Mission: Purge the Alien

Vanguard Strike saw us deployed diagonal with a 24" no mans land strip up the middle- straight heads up kill-or-be killed here with VPs per unit destroyed- I decided to play it safe and start with all my DW on the board and to lay in fire while the Daemons came to me...

Result: Tactical Draw (points win for Eddie, on secondary objectives)

Highlights:
  • Just versing this beautiful army was a treat in itself (albeit slimy and nurgle-y)! Loads of FW and new Daemon units all round, with loads of customisation.
  • Kept all my Deathwing on the board and put the Hammernators in a defensive line to shield the Tacticals and Scouts perched on the round bunker terrain behind them. They and Belial eventually ran into a line of advancing Plague Flies and wiped them out, before engaging the Great Unclean One.
  • Tacticals and Sniper Scouts poured huge amounts of bolter/ sniper rifle into multiple units, inflicting decent casualties. They were continuously bombarded by a Plague Drone (flyer) and lost most of their men, however neither broke at all. 
  • The Black Knights and Dark Talon came in right next to a squad of Plaguebearers that had materialised in my deployment zone- Rad grenades, Plasma Talons, Dark Rift Cannon and rapid firing twinlinked hurricane bolters saw them wiped out in short order!    
The bad stuff:
  • Belial accepted the Great Unclean One's challenge, and basically muffed most of his attacks, either missing his swings or failing to wound (one a 2+!!). Only thing I had forgotten was that he had a re-roll for every five guys he is leading- there were five termies backing him up. Wouldnt have done much to be honest, there was a load of invulnerable saves I failed.
  • The portal that Eddie dropped near my Devs and Dreads was scary- kept dropping out D6 amounts of any type of lesser daemons, which diverted fire away from the big scary soulgrinder in the distance that I was trying to blow up.
  • In the last turn one of the Plague Drones landed a blast template on the last survivors of the Tactical and Scout squads- their deaths giving Eddie enough VPs for a tactical draw, and getting his unit in my deployment zone for Linebreaker.     

  • Game four vs. Evan's 'Iron Snakes' Space Marines
Deployment: Dawn Of War
Mission: The Scouring (6 variable value mission markers)

This game saw Evan and I on Eddie’s beautiful modular-style city board. Once the markers were placed face down and deployment was done I infiltrated my Scouts to the middle of the board, in the canal that ran up the centre, giving them lots of nice cover (3+ with their camo cloaks). Evan had won the roll for first deployment/ turn and I didn’t attempt to seize. The markers when turned upwards were quite in my favour- I had the ‘4’ in my deployment zone, a ‘3’ was on the bridge close by, a ‘2’ right next to my scouts and the remaining 1, 2 and 3 were closer to Evan’s line.

Result: Victorious Slaughter to me, all secondaries acheived.

Highlights:
  • The terrain was AWESOME! Evan and I had a great time fighting over this board, it was exceptionally scenic and made for some awesome photos (See below).
  • The Deathwing proved extremely resilient, soaking up loads of Bolter (and worse) firepower, and their Fearless rule kept them on objectives even when taking casualties.
  • The Dark Talon mowed down the remaining Assault Marine next to his Drop Pod- 12 twinlinked boltgun shots will do that!! Rapid firing chews through infantry.
  • The Lascan/ML Dread lined up the rapidly approaching Stormraven and dropped with with a Lascan shot straight through the nose- the giant assault transport dropped like a stone, however it landed on the squad of Scouts with a S10 large blast! Somehow the one scout pulled himself from under the wreckage, to face the three Command Squad Veterans who had survived the explosive crash- they were keen to avenge the death of their Captain!

The lows:
  • Nothing to report- the worst was the Scouts being crushed by the Stormraven but I actually laughed at this...       


Game five vs. Ben's Khorne Chaos Space Marines
Deployment: Dawn Of War 
Mission: Purge The Alien

This was to be a meatgrinder of epic proportions- Ben's crazed and Fearless Khorne Bezerker army vs my implaccable Dark Angels- straight up VPs (+ secondaries) for units destroyed. I decided to keep the DW shooty units in reserve till turn two, to give them the best chance to land behind Ben's lines and draw his army in two separate directions...  

Result: Solid Victory for me

The highlights:

  • Belial and the Plascannon DW squad dropped in close to the Khornate lines and opened up with a huge burst of firepower, wiping out 7 bezerkers from one squad alone. The other squad dropped behind in Ben's deployment zone and opened up on Kharn's Bexerker squad, but the Assault cannon used 'split fire' to target the Forgefiend to their left- one rending shot shot got through and detonated the steel monster!
  • The Black Knights Outflanked on from the left side in turn one, hitting the Daemon Prince with a Rad grenade, and then four twinlinked rapid firing Plasma Talon shots- he failed all his Invulnerables and was sent screaming into the warp! The Dark Talon was poised nearby to open up with everything but found itself without a target!
  • The two Deathwing Sgts and the Tactical Vet Sgt all land precision shots before engaging in close combat- two power-fist wielding Champions are dispatched before they can cause too much harm.
  • The Tactical Squad decides that its best to not let the Bezerkers get a charge in- they assault themselves, boltpistols and flamer blasting away! They stayed in the battle with leadership tests each and every round as they lost men but never broke, and were only finsihed when Kharn joined the fray.
  • When Kharn finally detached and set off to his own deployment line to engage the last DW squad the DA Lascannon dread decided enough was enough- a single shot vaporised Kharn and it was all over.

The bad stuff:
  • The Helldrake roasted a bunch of the scouts, leaving only one alive- nearly nothing can stop their attacks against 3+ armour! It then went hunting for the Ravenwing Black Knights, scorching two of them (one got lucky!)
  • Kharn carved up Belial before he had a chance to reply- he laid down 7 wounding hits, and Belial failed three, using up all his wounds. He then carved through all the Terminators in the next round, with his 2+ to hit AP2 Str6 (re-rolls to wound) 6 attacks... very frightening!   

Pics from the tourney


Game 1 VS Antonio's Chaos Marines with IG allies- the traitors are holed up behind their Aegis defence lines.


 Snipers provide covering fire.
 Maiden runs for the Dark Talon and Black Knights, both very promising!


Belial and his DW associates, making friends 'the DA-way'. The cowardly Khorne Lord backed away instead of stepping up for a fight!

(He was back down to T4, and WS/ -1 Initiative though- Ravenwing de-buff attacks!)


 Lovely aqua coloured Eldar Force with new flyer and wraithknight.

 Necron 'croissant and wraith' list- great metallic red base colour.

 A pustulantly lovely Nurgle themed CSM list.
 Luke's very highly detailed Eldar army.


Necrons and Tau do battle over a verdant green battlefield.


 Game three vs Chaos Daemons- the Plague Flies approach


One of the Plague Drones swoops in opening fire on the Tac Squad and Scouts. Despite many casualities they hold firm.


 The last Plague Fly is cut down by the swarm of DW termies.

 A bigger challenge prersents itself- so long Belial!
Plaguebearers come swarming out of the maelstrom to threaten the Devastators.


 Eddie's semi-modular urban terrain board- a joy to game on.


Evan's Iron Snakes deploy near one of the mystery objectives.


 The Dark Angels amass on either side of the bridge, which has an objective marker. 

The Scouts infiltrated up the canal in some nice and solid, if somewhat murky, cover.


A Drop Pod full of Tacticals slams down in front of the Deathwing on the left side of the canal- they pour fire into the squad and then kill all but two in close combat- the survivors retreat.


An Assault Squad pours out of their drop pod near Evan's deployment zone, seeking vengeance.
 Tacticals hold an objective which is giving them a 3+ cover save (shield generator).
Survivor's of the Deathwing's attack, these Tactical Marines rally and assault the Scouts in the Canal. One scout lands an overwatch hit but it glances off harmlessly.


 The Iron Snakes Stormtalons unleash on the Dark Angels, evading the storm of fire from the Dreads and Devastators
In the back of Evan's deployment zone one of the Tac squads holds down an Objective with a Drop-pod shielding them from fire


 The hammernators Deepstrike in and set about creating a defensive line to protect the objective behind them. The DW squad on the bridge kept split-firing at the Drop pods and Stormtalons but didnt achieve anything.
 The Ravenwing Black Knights and Dark Talon launch a furious attack on the Iron Snakes Tactical squad but the DT is shot at by the Stormtalon, luckily all the shots pinged off its armour.
Belial and the Deathwing consolidate onto the '3' objective after wiping out the squad that held it in close combat.


Victory Dance!!


 Game five Vs Ben's Khorne CSMs, led by Kharn.

The Snipers throw shots into the approaching horde.


Unfortunately I didnt get any more photos of this game (or any of game three!), but I hope you like whats up here :)

Next post will be up really soon, with a detailed analysis of how each unit performed, ideas for next time, etc!


Cheers,
Tempest

Monday, September 24, 2012

Assault Marines update 25 September

More progress here on my Assault Marines- i've now got 16 assembled, with 6 base coated and washed, the rest are still sitting around in black undercoat waiting. Once the red + wash goes on i've been painting the raised areas of the collar and small sections you can't get to easily and then gluing the helmet heads in place.


The 6 red amigos so far. Even in base colours they look swanky. The urban bases certainly help!


I'll be very happy once i've got all 30 Jump Marines assembled and red basecoated, even though there'll be quite a lot left to do to get the army completed. Still, continuous progress and getting an hour here and there in is making things happen!

Oh, and I played a game with my mate Alan last weekend, still trying to learn the game. Learnt several valuable lessons here:

  1. Imperial Guard can rapid fire 24". In a blob squad this means unbeleveable casualties if a poor marine squad deepstrikes scatters into range. There is only so many rolls you can make before the ones appear. The marine adage of "look to your wargear brothers!" wont protect you from 40+ hits from a lasgun...
  2. Wound allocation in 6th edition (assuming no insane variations in armour types per squad) is easy to get your head around, and is reflective of exactly 'how it happens' in real life combat. Death comes swiftly from the direction of fire OR the front line of the melee.
  3. Be careful who stands closest to your Sgt or other IC, they're the one who gets to take the Look Out Sir! bullet, not some pleb at the back. Once again, as it should be.
  4. Feel No Pain may circumvent AP2, but its useless against twice toughness (ID)... damn you Leman Russ battletank!
  5. Rolling 1s and 2s for Reserves is fine when you have men on the board, but when you start turn 4, fail to bring in a Stormraven with Terminators and Librarian AGAIN, and you are down to 4 men, you hope for the best.... However these guys were staring down the barrel of a Leman Russ, a Grey Hunter Squad, several squads of Tallarn Desert Raiders and a Hydra AA tank. Long story short, I lost all my infantry, my Dread and his Drop pod were both gone and I ended up with no models on the board. Instant Game Loss!!


At least the urban city boards are painted LOL


Alan's Wolves array for battle, covered by his newly assembled (but still WIP) Hydra and the Leman Russ that caused me so much pain!! A solid list at 1500pts.

I think my own 1500pt list is useable, but I need to work on where I drop my Furioso, and how to deploy and take action with my jump squads. Ive never had a lot of jump troops to use before, so the coordination of three full squads is something i'm yet to work out- maybe some Internet tactic searching will help.

Thats enough for now! Any comments or feedback is welcome as always!

Thursday, February 23, 2012

The "Kan Wall", BA SangGuard and some big-name repaints!

Hi all, welcome back! I've been relatively busy of late with house and baby-centric preparations (only 10 weeks to go!) so the hobby has been pushed back a little bit.  I've still been able to get a lot of things done though in the limited time available, namely trying out some NMM gold techniques on a squad of Sanguinary Guard, and assembling and lightly base colouring some Killa Kans. The former was due to a desire to try something I havent done before, the latter because I was hoping to  get a semi-competitive "Kan-Wall" list ready for a one-day tourney.

Here's how the Sang Guard are going... pretty happy for a first try!


So regarding the Orks- I got the Kanz glued together and undercoated in just one night, including removing all mold lines, flashing etc and then got their main hull/body sections coated in a single layer of hawk turquise to help them look less like flat-black flailing robots. I also undercoated and then painted the skin onto the Painboy and Grot orderly for my Nobz squad as well as the Big Mek with Kustom Force Field. Nobody wants to see bare metal, or just black undercoat. A small bit of effort always goes a long way.

I then ran the boyz at the local tourney (1400pts), and the first game demonstrated how hardcore a Kan-wall can be. Running two squads of 3x Kans,  two x 30-strong Boyz mobs and a Warboss, 9 Nobz + Painboy and Big Mek with KFF all in a Battlewagon I essentially steamrolled the Marine army in front of me. The only major losses I sustained were the Warboss and Nobz, who failed to get a charge in by a half-inch, and were then themselves assaulted by Lighting Claw- toting Terminators and a Captain. I eventually whittled these guys down with a mob of Boyz, dealing on average 60+ attacks per turn until they were gone- 2+ armour can be good if you dont need to take 9 saves per model! Aside from that, the only other significant loss was a single Killa Kan to an assault cannon shot, and this was after both Kan mobs had carved up a Landraider Redeemer into several smoking sections. They then went on to attack the Tactical Squads positioned at the back of the board, taking them down with grotzookas, missiles and then close combat. Here's some pics from the game:

Deployed and ready to roll!! Everyone has access to the KFF bubble at this point of the game :)


Waaagh!!! Kans carve the Landraider into ruin, the left Boyz mob swamps the terminators whilst the right ones rescue "Frosty Frostington" (the snowman) who was the main objective.


And in the final stages of turn 4, the Kans engage and massacre the Tactical Squads :)


The unfortunate thing was that I had to bail out and return home after this first game, so I'm not going to automatically assume that this is a dynamite killer list just yet. I will however admit that its the basis for a strong list, especially with another 350 points added on top to equal the 1750pt limit that is most commonly seen around the local tourneys. Im thinking that I'll be throwing in another 3 Kanz, and will therefore have 3 Grotzookas, 3 Rokkit Launchas and (if i can scrounge the parts) 3 Kustom Mega Blastas. I'll also be looking to add a Deff Dread with twin scorchas, mainly just to give the opposing forces something big and scary looking. Stat-wise and for its points, a Deff Dread is considered an underperforming unit, however I'd be looking to utilise it in the psychological 'big and scary' role for keeping my Kanz alive. With armour plates and grot riggers it should be able to keep rolling forwards attracting fire and keeping the other elements of my force unmolested. The last switch/addition i'd be taking is another KFF Mek, removing the Warboss from my list. This then opens up about 130 points to use, so I'd possibly get another Deff Dread. 11 Walkers, 60 Boyz, 9 Nobz (upgraded with more Pklaws), a battlewagon and 2 KFFs to cover the whole army?? I know why this type of list has a reputation...
       
*Update: I've now purchased another 3 Kanz, and a box of Lootas/Burnas- more green-death to come!* 


And now, switching back again to the painting side of things...

Following my recent discovery of the greatness that is Simple Green concentrate I have been diligently rescuing some of the old models in my posession from the captiprison of thick, claggy and decidedly unattractive paint. Some of these minis are mine, and some of them belong to my friends- I've taken it upon myself to help them with paintstripping, cleaning up and (where appropriate) repainting the figures. So far the roster of submerged minis reads like a roll call of some of the greatest and brightest in the 40K universe, comprising Abbadon the Despoiler, Pedro Kantor, Kharn the Betrayer, Azrael (and Helmet Bearer), Interrogator Chaplain Asmodai as well as another "mystery guest"...

My penchant for stripping and repainting minis came after a forum discussion last year on repainting vs stripping and starting over, with which I concluded that the best approach is to start over if the materials to do so were available and the current paintjob is too thick to be covered. A great example of repainting on here is my Terminator Chaplain (the guy in my avatar), who copped a light re-spray in Chaos Black undercoat before having everything painted over again. However, I think that he's the exception to the rule, as the existing paintjob needs to be relatively smooth and thin if you are going to attempt this.

Luckily I have been able to source concentrated Simple Green from my local hardware store, and have been able to get stuck into the process of rejuvenating some previously forgotten or unloved minis. The stripping process can take as little as a few days in the solution for one-coat thick paintjobs or a week or more if there is multiple thin coats and a good sprayed-on undercoat, which acts as an anchor for the paint above to grab to. I generally leave the minis in for a week minimum, and once the green colour starts to dissappear from the solution the minis come out, get washed and have all small remaining paint traces removed from the deeper crevices and edges with a dental pick (a pin head does a similar job).  However, 9 times out of 10 a quick blast under a tap on high pressure tends to remove everything anyways.

So here's a few pictures of the current luminaries awaiting their rebirth- these were photos from games that they've participated in over the last couple of years. Im hopeful that once repainted they'll be back onto the tabletop again to lead their power armoured cohorts to glory/infamy....

Pedro Kantor- the Chapter Master of the Imperial Fists was done up with different coloured eyes for some reason, which combined with the blue/white panoply seems to make him look like a clown. Im hoping to restore some dignity to this guy, and have some great plans surrounding his powerfist regarding some OSL work and some freehand stuff here and there.

Abbadon- his previous owner had painted him in Iron Warriors livery, which looked cool (at a distance) but was way too chunky. He also had huge eyes painted on, like he was running purely on coffee.. Not sure yet what scheme to run with, initial thoughts are the traditional GW black scheme but maybe throw some thinned purple washes in there to give a sinister aspect to the highlights... looking forward to doing all the skulls and small details on him.

Azrael- My original chapter master from 1994 will finally be repainted to lead my Dark Angels- whilst I have another metal Azrael and helmet bearer mini at hand, i'd prefer to use this actual mini as he's the one that's led me to victory countless times before. Although his plasma gun arm is missing in the pics, its now been located. Im still very proud of this original paintjob, it was done with unthinned old-skool GW paints, the equivalent of a standard brush and with the talent available to a young 14 year-old version of me.

Asmodai- the interrogator chaplain is in dire need of a repaint, I cant wait to get him back out cracking skulls- even if its with his confusing double power-weapon loadout that makes no sense (in this edition at least- in second ed a sword could be used to 'parry').

The Mystery Guest (?)- I found a 2nd edition model recently that I just couldnt pass up, he's being done up to test a few techniques and for another reason that I wont divulge just yet. Suffice to say, very keen to get him done!

So even though I have less than 70 days until my baby is due, I've got a lot of work ahead- at bare minimum I want Abbadon, Pedro and the Mystery Guest done, the other guys being less of a rush. Will I get them done? I'll make sure to get progress pics up as they come- they're all about to come out of their bath for a rinse! In the meantime, here's two of the minis who will be getting some work- the "before" shots if you will :)

Urgh!!! I think we can do something with this... Pedro needs love... i think glowing powerfist fingers and eyes will fit the bill nicely, and a "Tempest" spin on the GW Crimson Fists paint scheme ;)


Not bad for something painted 18 years ago!! I owe you a new lease on life my Supreme Grand Master... especially with the rumoured DA Codex inbound! 


Thats all for now, im hoping to get something up again soon.

Cheers,
Tempest
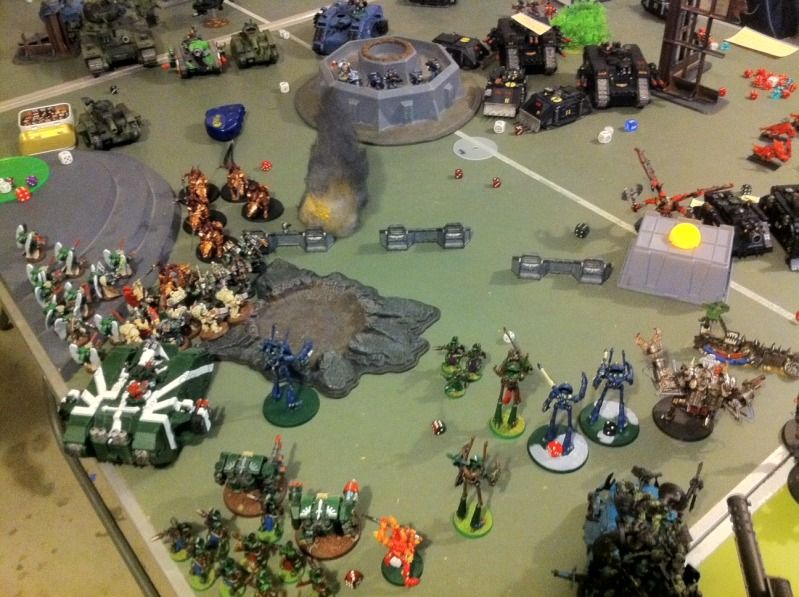
Sunday, December 4, 2011

40,000 points of devastation! Apoc Battle Report

Well, it finally happened- on the 26th of last month we finally ran the Apocalypse I’ve been talking about for a while now with seven players in total and a thrown together Ork army being run by Adam and I to even things up. The players and their respective armies were as follows:

Colin- Daemons
Ash- Necrons/Chaos/Renegade Marines
Ross- Hawk Marines
Alan- Imperial Guard/ Space Wolves

And on the other side of the table-

Adam- Imperial Guard (Armoured Company)
Brendan- Grey Knights and Eldar
Me- Dark Angels
Shared Army- Goff and Deathskull Orks

The game was run without any objectives to capture, as we were using straight up Victory Points which proved to be relatively painless as everyone was required to provide two half-point costs listed against each and every unit on their list (including vehicles and transports) so that points could be given to the player that earned them for taking a squad to less than half starting models/ immobilised for vehicles, and also for wiping out/destroying the unit.

Terrain was laid out in a relatively open manner, with Adam’s landing pad being the centrepiece for the game right in between both forces. The table deployment line was set with standard Apoc rules using the scatter dice and a line to the diagonal opposite table edge, with the ping-pong table side having a very large deployment area and the grey table side a much smaller and more compact area- my team bid 30 minutes for deployment vs 4 minutes for the other boys. They decided to take the larger deployment zone and they put down what they could in four very frantic minutes, with the exception of Ash who was on his way and would deploy in the second turn. On his behalf though, his allies had placed his (made by me!) Doomsday Device up on the deployment line where it could cause havoc. Never let it be said that a flickering LED candle inserted into a ping-pong ball, inserted into a plastic screw container is not threatening...

Our team put down everything except for my Dark Angels (sniper scouts did deploy though), all our flyers and Brendan’s Eldar grav-tanks. The main battleline was comprised of two Stompas- each with a Kustom Force Field Big Mek- being placed 2 feet apart, with a full 111- strong Ork “Green Tide” Apocalypse Formation in between them- being infantry they were covered by the KFF bubble giving them a 5+ cover save from ranged attacks! In front of each Stompa was a mob of Kanz, Nob-filled Battlewagons beside them, and a Deff Dread in front of the left Stompa. Behind this front line was row upon row of Leman Russ Battletanks and Demolishers, Chimeras, Heavy Weapons Squads and two Shokk Attack Meks- one in the bamboo trees, the other on the extreme right in the stone fortress with a bunch of Burna boys, and backing all these units up was two Baneblades on the right and a formation of Basilisks on the very back table edge.

Our opposition had a full complement of Daemons on the left side of their deployment line, in a “Tetragon of Darkness” Apoc Formation, Daemon meaning that whilst the key Greater still lived, all units in this Formation were extremely hard to see/hit, as all our shooting at them would be using the Night- Fighting rules. Ross’s Hawk Marines anchored the middle and the right flank with Tactical-Squad- filled Rhinos, and several Land Raiders, with a small Assortment of Space Wolves, Leman Russ’s and a Baneblade, with a scary back-line made of Basilisks and a single Deathstrike Vortex Missile Formation (Alan plays for keeps in Apoc!)

And so without further ado, here is the turn by turn rundown of the incredible destruction, heroics and sacrifice that made this such a phenomenal battle!

Turn 1:

•With all launch protocols satisfied and with the Lord Commisar’s approval the mighty Vortex Missile flies skywards on a trail of fire. Arcing downwards it explodes next to an Ork Stompa, destroys an IG Command Squad in their Chimera as well as vacuuming up a Battlewagon with its full complement of “Deathstar” Nobs and their Warboss! The resulting Vortex template that remains spends the rest of the game wandering around randomly eating Leman Russ tanks, scaring famed Chaos Warlords and blocking unit movement.
•A squad of screamers breaches the disruption field and destroys 3 artillery vehicles on their next turn.
•The Dark Angel Sniper Scouts joined up with the Ratlings when infiltrating deep in the enemy backline to harass the Deathstrike and Basilik artillery guns and the squads guarding them, with an unofficial contest starting up to see who would make the most kills.
•The Goff stompa poured out more than 70 shots from the psycho-dakka blasta, killing Ku’gath Plaguefather and nullifying the tetragon of darkness. The Deathskull Stompa followed suit with 60 plus shots into the tactical squads in front of it, wiping out two of the three and sending the surviving Sgt fleeing in his Rhino in the next turn.
•Seeing the main landing pad in front of them as a hindrance, the Linebreaker Formation of Vindicators annihilate the installation, leaving only a smoking flaming set of craters, opening up lines of fire and setting the stage for the most brutal of close combats.
•Commissar Yarrick and an entire platoon hid away inside their tanks for an entire game! What a Hero...
•A unit of Deathwing teleports deep behind enemy lines to shoot up the basilisks, blowing up one.
•Due to limitations on deployment space, the Marine Hawk Landraiders (particularly the Terminus Ultra) and the Razorback were all out of range in the first turn – a tactical disadvantage as the first turn was theirs to fire away. This meant that five twin-linked lascannons and three single lascannons missed a turn of firing with a large mechanised Ork horde closing in.

Turn 2:

•The Marauder Bomber lines up its run but is forced to disengage due to the heavy screen of AA fire streaming up in its sector.
•The Deathknell Orbital Strikforce lands to the right of the Goff Stompa, a full complement of 50 Terminators and a Dreadnought.  They were initially targeting the middle of hte Green Tide, but were sent off course by the Disruptor Beacon just behind the Ork lines.
•The Last member of the Platoon Command squad guarding the artillery up the back takes a Rending shot through each eye from the Ratlings.
•Sly Marbo appears to deliver some C4 pizza to the Deathwing, killing four of them. He is then shot into pieces of dogmeat by the Stormbolter of a vengeful DA Terminator Chaplain.
•An IG Veteran squad wander out of their Valkyrie, fail to hit anything except TKing half their own squad with a demo charge, but finally manage to destroy a Leman Russ in assault before being virtually wiped out.
•A lone Dark Angel Predator Annihilator rolls up on the right side table edge to engage Abbadon’s Land Raider but fails to penetrate with its main lascannon turret. It was then swiftly destroyed by a swarm of scarabs that ate through its armour and reduced it to a smoking hole-riddled hulk.
•The DOOMSDAY DEVICE (must be capitalised!) becomes “active” but doesn’t bring any effect out just yet. Unreasonable demands are made that our team hands over all our Blue Cheese or the Chaos Lord will visit ruin upon our world. We resolve to just destroy the DD and hang onto our delicious dairy products... 
•The Orks start laughing and pointing to the sky, where several massive flaming shapes can be seen- giant asteroids pulled into orbit by tracktor beams. However the massive Roks miss the battlefield by a wide margin, denying the greenskins the devastating strike they were hoping for.
•The Ravenwing Landspeeder deepstrikes next to a Baneblade and opens up with its Multi-Melta, destroying the super-heavy’s main gun before being destroyed by retaliatory Leman Russ fire.
•Azrael, Belial, the Terminator Chaplain and a Squad of Deathwing engage the Bloodcrushers, supported by a mob of Stormboyz and a Dark Angel Assault Squad led by a Company Master. The  Bloodcrushers are wiped out with only a few casualties from the Assault Marine squad
•The 100+ strong Green Tide Ork mob smashes into the daemons in the cratered ruins of the landing pad, dealing out over 350 attacks on the charge to the three units they engage, as all of them are in range to get their attacks and only a few boyz are lost in to the Daemons first strikes! The Daemons are severely depleted but there are more queuing up behind them for a go... the ladz care not- WAAAGH!!!
•Another swarm of scarabs eat through the armour of one of the Baneblades, reducing it to 0 AV and the tank is destroyed.
•The Dark Angel Assault Marines are caught in a blast from the nearby Baneblade’s Demolisher cannon, wiping them all out except for the Jump-pack Company Master who survives thanks to his Iron Halo. Realising that the warmachine is out of his league he goes hunting infantry instead.
•The Daemon Prince and Greater Daemon assault one of the Shokk attack Meks and his burna boyz, turning the mek into a Chaos Spawn in the process. They are only destroyed later on by the timely intervention of two Grey Knight Dreadknights. 

Turn 3:

•The Dark Angel Company Master leaps into the central bunker to assault and wipeout a squad of Long Fangs, but only just survives with one wound remaining.
•The techpriest enginseer charges in against the scarabs to save the second baneblade, but gets eaten. Its all those delicious augmetics... nom nom nom. Thats 1000VPs earnt by the one small swarm alone!
•The DOOMSDAY DEVICE sends out two giant beams of death, striking both Stompas like hammer-blows- the Deathskull machine is immobilised and has its Deathcannon destroyed, and the Goff Stompa is reduced to two structure points. In the Ork’s turn the Deathskull Mek waltzes out onto the arm and beats it with his wrench until it powers up again.
•The Dark Angel Devastators and Whirlwind were deployed in a position behind the main Ork battleline waiting for the expected Daemon breakthrough, but never had any chance to hit enemy units as the swirling combat in the centre continued on for three full turns as the Orks refused to break and just continued crushing everything thrown at them.
•The Goff Stompa charges in and carves a Chaos Fellblade in half, the explosion taking out several nearby renegades and Necron warriors. It is finally destroyed by a squad of Terminators, its own explosion taking one of them out.
•The three armoured sentinels behind the Deathskull Stompa open fire on the Linebreaker Vindicator squadron, destroying one and stunning the others with one round of shooting, achieving a result where the rest of their comrades had failed previously.

Turn 4 (Last Turn- time constraints):

• The demon princes that got scattered on deepstrike arrival end up killing the chapter master of the Grey Knights and destroying a Stormraven.
• Azrael, Belial and the remaining Deathwing engaged Logan Grimnar and his Wolfguard, with both sides fighting to a draw as the game ended.
•A Squad of Veterans jump from their valkyrie, shooting the baneblade with three meltas and destroying it, stealing the VPs from the Fire Dragons who were too busy reloading their guns!
•The Dark Angel jump-pack Chapter Master attacks a nearby Landraider, strapping a meltabomb onto its hull and immobilising it in the explosion.
•Massed Leman Russ, Demolisher, Conqueror and Chimera firepower finally wipes out the last of the Deathknell-Formation Terminators
•Abaddon and his squad deigned to grace the pitiful mortals with his presence, leaving his Landraider finally! However, a Shokk Attack gun and some IG heavy weapons teams culled his entire squad and knocked him down to just one wound. He also spent a nervous turn watching the Vortex template disappear and then reappear beside him.
•Changeling saving Ku’ros Fateweaver from being charged by some nobs by making them shoot a Killa Kan instead.
•The deff dread in the centre loses a combat arm and its skorcha, then advancing between two burning vehicles to destroy a necron squad in close combat.
•The Marauder finally makes an appearance, having previously turned back due to long-range Ack Ack fire, it drops its full complement of bombs on a squad of Necrons Warriors and some Daemons, blowing them into small pieces.
•One lone Tzeentch Flamer survives two rounds of combat with the grey knights squad that killed the rest of its squad, beating all the odds!

The Result:

So, the final result was a win for my team, with 11,220 VPs, and the opposing team ran up 8271 VPs, a very decisive victory no matter how you look at it! 

Photos!

Here’s an assortment of pictures from the day, showing the insane scale and destruction that a 40,000pt battle entails:


Our team's deployment line
110 Boyz and a Warboss- Greentide!
The Linebreaker Formation annihilates the landing pad!
Deathknell Orbital Strikeforce teleports and drops in after a massive lance strike to clear the ground.
Da Ladz suss out the competition, but ultimately decide to go Daemon bashing! 
Necrons and Chaos deploy after being initially delayed.
Abbadon declares his intentions to all and sundry, presses the big red button and the Doomsday Device powers up! The Bloodthirster appears impressed!
New-codex scarabs vs Baneblade- 600VPs to the small metal swarm after eating the superheavy to pieces.
The Greentide about to crash into the Daemons, with the two Stompas hosing everything with their Supa Gatlers
Flyers strike deep behind our lines
the Kan decides to destroy a Drop pod as a last act of defiance before the Terminator's crush it to bits! (My flaming wreckage markers worked so good- flickering LED candle hot-glued inside pillow stuffing, with black spray on the outside!) 
The stompa scythes the Chaos Baneblade "Storm Of Chaos" into ruin! 
The Bloodcrushers are assaulted by the Dark Angels and a small unit of Stormboyz, whilst the Wraithlords and Deff Dread advance on the Doomsday Device.
The Assault Marines, Dark Angel Lords and Deathwing plan their next move.
The Marauder finally appears, weaving through the smoke-filled skies to deliver a huge payload to the Necrons and Daemons below. The very left flaming wreckage is the remains of the Linebreaker squadron.

The raw numbers...

And a couple of graphs showing the end VP results- the battle for MVP on the other team went down to the wire and was only won by Alan by a margin of 39 points!! And its obvious to see why my team won this battle- the Orks came storming out of the gate from the start and kept pouring on the death, culminating in a massive 1700+ VPs haul on the third turn alone (which is more than my Dark Angels scored all day!)

So what next?

Well, seeing how a lot of people are going to be tied up over the next 4-6 weeks with Christmas, New Years and things like Cancon its looking unlikely that there will be another Apoc until at least mid- to - late February. This in itself isnt a bad thing, as a few more people should be available to participate in the next game, and the returning players should have that extra time to complete new units or paint up what they have. It also gives me some time to build a nice shiny centrepiece terrain structure for the next game, i'm thinking of a large Manufactorum or Ork Fortress.